Sunday, March 31, 2013

Happy Easter!

Sending everyone Easter wishes for today and the whole year through!

This is a shadowbox card I made while on the design team for the Creative Critterz Imaginations blog, which is sadly, no longer updated.  However, you can view my original post here.  The card was made using my Cricut Imagine, which I still love using. 

You can see how I created my own shadowbox effect.

And this is the inside of the card.

For all of the details and my supply list, please visit my original post here.

Have a wonderful Easter Sunday!

Merilee


Thursday, March 28, 2013

Sharing a little bit about my life.

Hi Everyone!  Today is Thursday and it is beautiful and sunny here in Atlanta, without a cloud in the sky!  As I recover from pneumonia, I thought it might be nice to share a little bit about myself. 

My husband and I are "empty-nesters" living in Atlanta, Georgia.  Our kids are grown with children of their own, all living in the Midwest.  We miss them all terribly, but we know that they each have their own lives now. 

Hubby and I have four dogs to help fill the "empty-nester" void.  I thought you might enjoy seeing photos of our furry little family, so here goes!

This is Chloe Bernice.  She is our little Toy Poodle.  I thought this was the cutest picture with her little tongue sticking out as she drifted off to sleep. 

Although I chose Chloe to be my fru-fru "purse" dog, it wasn't long before we realized that she didn't really fit in that role at all.  Instead, she is my hubby's best fishing buddy!  :o)  Poodles were bred to be water retrievers, and that breeding is well established in Miss Chloe.


Next up is Mr. Rusty Paws.  He is from a small rescue in Tennessee and is a Beagle/Black and Tan Hound mix.  

 My hubby picked him out as a 10 week old pup to be his fishing buddy, but you know what they say about animals--they pick YOU, not the other way around, lol!  Since Rusty really HATES the water, he chose to be my loyal guardian and companion.  He won't even go to bed without me.


This is my sweet Summer Breeze.  Summer is a special girl who came from a rescue here in Georgia.  She is a Papillon rescued from difficult circumstances. It hasn't been easy for Summer to trust, but over time she has blossomed into a sweet, loving dog. 

Can you see her smiling?


Last, but certainly not least, is our little Sweetpea.  She is a coarse hair Jack Russell Terrier.  She was rescued in Oklahoma and came to us as a little, scraggly pup--so ugly she was cute, lol! 

This little stinker loves her entire family and shows her boundless affection to everyone, humans and dogs alike, by slathering them in kisses.  She has brought sunshine into our home and is happy from the moment she opens her eyes in the morning, until the time she finally drifts off  to sleep at night.  What a blessing!

I hope you enjoyed a little insight into my little furry family.  My daily inspiration is, in large part, due to them.  They are certainly the ones who keep my husband and I going when we live so far away from loved ones.

I will be visiting each of your blogs, enjoying your creativity until I get a little energy back to create again myself.  Have a great rest of the week and thank you for visiting!

Merilee


Monday, March 25, 2013

A bit of a cautionary tale...

Hi everyone!  Hope this finds you all happy and healthy--some of you making springtime snowmen, lol!  We haven't had any snow here in Atlanta, but we sure have had a lot of wind and rain and even hail. 

A week ago this past Saturday my husband and I were enjoying a beautiful evening at our friends house, all of us sitting around the bonfire in their backyard.  Our friends have a pretty house on a lake.  The weather that night was cool and crisp--perfect for a bonfire.

I have asthma.  Up to this point it hasn't been too hard to live with, but I know that smoke is a trigger for me. Nevertheless, I decided to take a chance and join the fun.  The wind was blowing and shifting the smoke back and forth.  I held my breath, got up, and even moved my chair when the smoke blew my way, but it wasn't enough.  By the time I got home, my throat felt raw and my lungs hurt.

During the next couple of days I used my inhaler faithfully, but things only got worse.  I began to run a fever, my energy level went down to a new low, and a dry, hacking cough ensued. By Thursday I felt so bad I didn't want to get out of bed, so I made an appointment at the doctor's office only to find out that I was having a severe asthma attack which had turned into pneumonia.  I have been very, very sick ever since.

The reason I am blogging about this incident is to warn those of you with asthma not to take it lightly.  Even if you haven't had problems with smoke before, this can happen to you.  Remember, breathing is essential to your daily life.  Asthma prohibits your ability to breathe very quickly.  I have learned a new respect for myself, my asthma, and the simple act of breathing.  I will never take it for granted again.

I am now on several medications to help me recover from pneumonia.  I've been very, very sick. It all happened so quickly and so innocently.  It seemed perfectly harmless to sit around a nice, warm bonfire with friends and enjoy the evening.  I put my health and my life in jeopardy in just a couple of hours.  It wasn't worth it. Enjoy your life, but please don't take chances with your health in the process. 

As soon as I recover, I will get back to creating.  In the meantime, I will be visiting all my favorite blogs to see what you've been creating. 

Have a great week and take good care of yourselves!

Merilee

Thursday, March 14, 2013

Happy March!

Hello everyone!  Hope you are doing well.  My apologies for not posting since December.  There has been a lot going on in my life and I felt I needed to take a short break. 

With springtime upon us, I've got my creative mojo back and I'm ready to begin again fresh and new.  You will be hearing from me very soon with more projects. 

In the meantime, thank you for hanging in there with me and I look forward to sharing a piece of my life with you again.

Have a great day!

Merilee

Tuesday, December 25, 2012

Merry Christmas!

Merry Christmas to all of my blog friends.  I wish you hope and joy and love during this holiday season and especially on Christmas Day.  I would like to share the true meaning of this beautiful season.
May The Lord give you peace and harmony on this Blessed Day.

Merilee

Friday, December 14, 2012

Clean and Simple Snowflake Card

Hi Everyone!  I hope you are all enjoying the holiday season.  I'm not quite ready for my family to arrive, but I'll finish things up this weekend, I hope!

Today I have a clean and simple Snowflake card to share.  This card was a little difficult for me.  I am a "more is more" kind of gal and it was hard not to add more detail.  However, I refrained as best I could and this is the result:
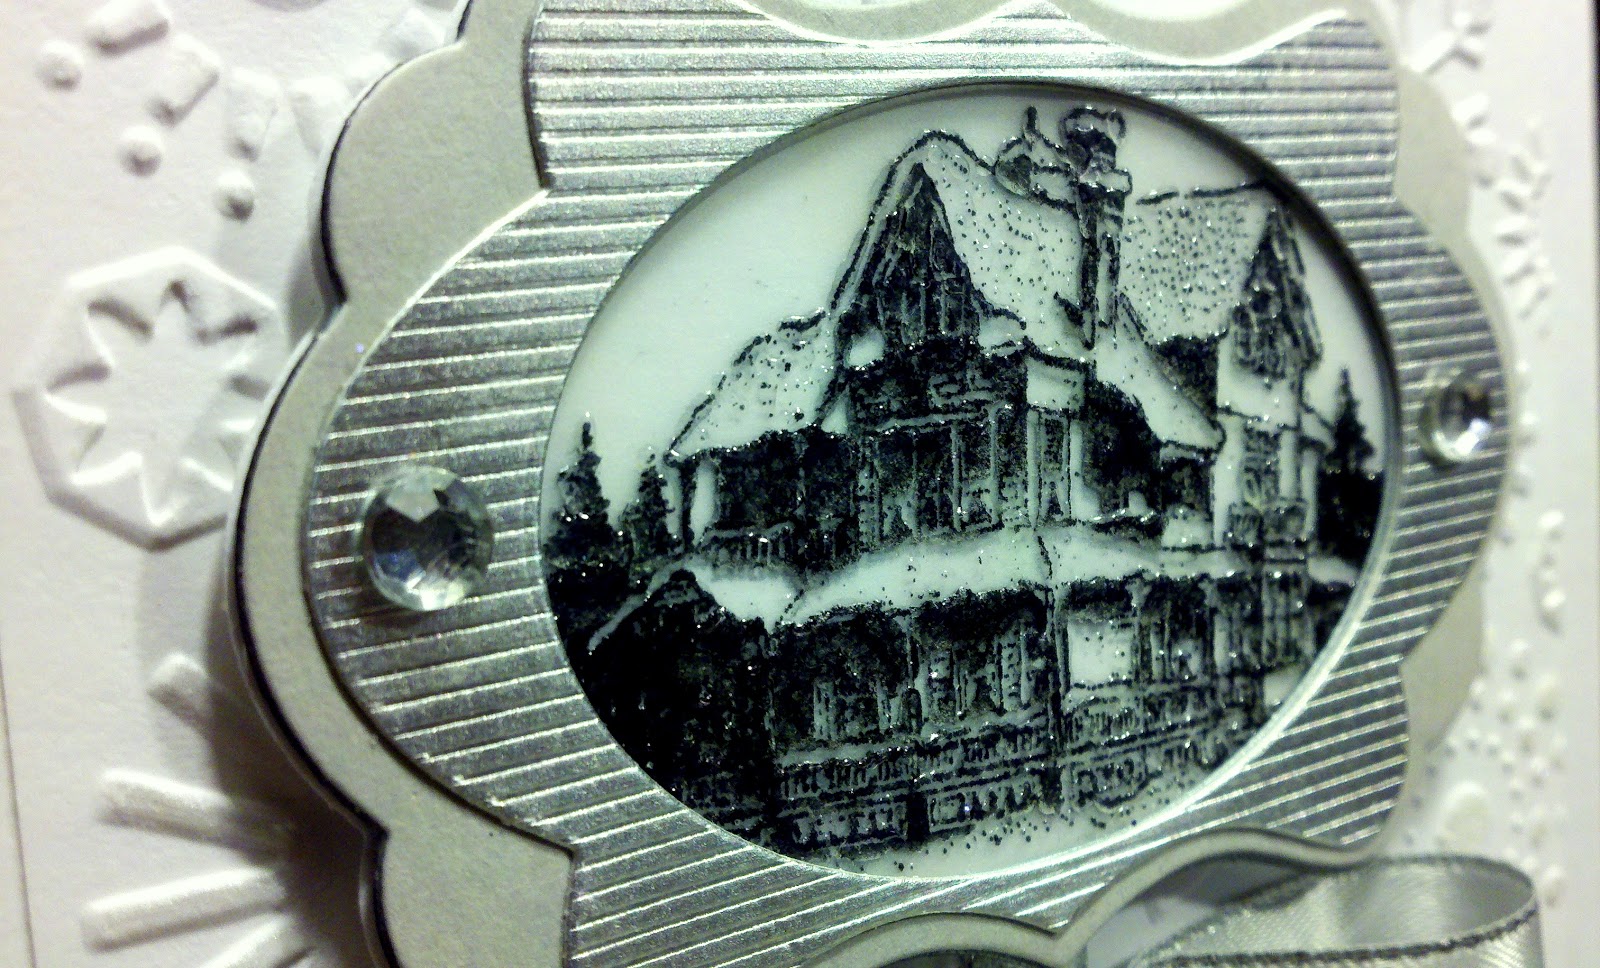
I entered this card in the Cardz TV Design Team Challenge #21, "I'm Dreaming of a White Christmas".  I wish you could see the details a bit better.  Instead of adding a lot in the way of embellishments, I added different textures.  The background is dry embossed in a snowflake pattern.  I used my fine tip glue pen to add a bit of glitter to only a few flakes.  Then I used a tiny brush and some pearl paint to add a bit of iridescent shine to a few others.  Hopefully you can see that detail a bit better below...
The embossed background was matted on white cardstock and wrapped in silver satin ribbon.  Then I cut a very thin piece of embossed silver metallic cardstock to apply to the center of the ribbon. 

The focal image was stamped twice, once on white copy paper and once again on vellum. The vellum image was then immediately sprinkled with ultra thick embossing powder and heat set. I wasn't sure how this would turn out, but was pleasantly surprised by the perfect dimension it provided.
I used my MFT Wellworn die to create the frame for the focal point. I cut the background in flat gray cardstock and then the center frame was cut from embossed silver metallic cardstock. I then added rhinestones on either side to finish off the look without taking too much away from the focal image.   I layered the two stamped images on top of each other to add a bit of depth in color, and then set the frame atop. The entire focal image is adhered with pop dots for dimension and a simple bow tied and adhered beneath.
Here is another view so you can see the dimension. I'm sorry...the sparkly and iridescent snowflakes in the background don't seem to photograph very well.
I also kept the inside of the card simple and clean.  You may be able to see the detail in the snowflakes a little better below...
I added the same ribbon around the cardstock and topped it with a thin strip of metallic cardstock to match the card front.
And, of course, the back wouldn't be complete without my company logo.  The frame around it was cut with my Cricut Expression and Lacy Labels cartridge in the same embossed, metallic cardstock.  I usually always add a rhinestone above the banner to add a bit of personality.  (There goes my "more is more" again, lol!)

I hope you enjoyed my card!  I will be back soon with another project!

Thanks for joining me and happy holidays to you and your family!
Merilee

Recipe:
Cardstock:  Recollections; AC Specialty Paper-Foil
Stamps:  Stampin Up-Christmas Lodge; Flourishes-Sentimental Christmas-SS179; PSA Essentials Personalized Stamp
Die:  MFT Die-Namics-Wellworn
Ribbon:  Really Reasonable Ribbon
Ink:  Memento-Tuxedo Black
Adhesives: Zig Two-Way Glue, Pop Dots; Glue Dots; Zots; Scotch- ATG, Mounting Tape
Other:  Ultra Thick Embossing Powder
Tools: Fiskars-Paper Trimmer, Easy Stamp Press; Scotch ATG Gun; Cutter Bee Paper Snips; Martha Stewart Score Board; T-Square; Sizzix Big Kick Machine; Cricut Expression; Cricut Lacy Labels Cartridge


Prayers for Victims in Connecticut

Today is a sad day in our history.  My heart is extremely heavy thinking of those victims of the shooting in Connecticut.  So many innocent people killed...so many innocent children who lost their lives before they had even begun. 

I will keep the families, the children, and everyone involved, in my prayers.  I ask that you do the same, as this tragedy is unthinkable.  I pray for those taken from this earth before their time; I pray for those broken families left with a vast hole in their lives that can never be mended; I pray for those children who lived through this horror, and I pray for the lost soul who committed this heinous crime.

Please join me in prayer at this sorrowful time in the lives of so many people.  Together, with the strength of prayer, we can reach out to help make a difference.

Thank you,
Merilee


Wednesday, December 12, 2012

Country Chic Christmas Card - Details and More Photos

Hi everyone!  After running into the storage dilemma on Google, I found that I had to purchase additional storage in order to continue adding photos to my blog posts.  I was surprised by this change, but the world is always changing, isn't it?

I'd like to continue my previous post so I can show you some close-ups of the Country Chic Christmas card featuring my sepia tone Santa.  I also wanted to show you the two cards side-by-side, so you can see how one stamp can be used to create very different cards.

So let's begin with the close-ups of my Country Chic card and a few details describing how it was created.
I don't know about you, but I LOVE to recycle and/or upcycle things to use as embellishments on my cards.  I've added some things like that to this card.  Can you find them?  Let's take a closer look...
The corrugated cardboard I used for the plaque is made from a coffee sleeve!  My husband and I love to go to Barnes & Noble, drink coffee at Starbucks and read our favorite magazines.  I always save the Starbucks coffee sleeves to take home for projects.  Now I've got too many, so I have decided I can't save any more until I use the ones I've got, lol!
 
Here is a view from the side of the card.  In order to add dimension, you can see how many of the elements are set away from the card base at various depths using different thicknesses of foam tape and pop dots.
I added a white "brick" center border to separate the two red and white patterns.  Then beneath the border I added some braided trim I found in my sewing stash.  I has a slight sparkle to it for added interest.
The cardboard background for this embellishment was cut from the remaining coffee sleeve using my circle punch.  Then I added crackle medium to the focal point, as well as to the berries on Santa's hat, to add a little more vintage feel.  I love the way it turned out!  Here's a better look...
For the sparkly effects in the pine sprigs and holly I used Stardust Galaxy Gelly Roll pens.  They work great in adding detail to things such as these!
These little tickets are from Whimsy Stamps-Holiday Ticket Sentiments.  I actually stamped and cut these tickets first from kraft cardstock and then again in off white cardstock.  I fussy cut the second set and inset them onto the kraft set so they would stand out a little more.  The doily I used was actually a little small for this project, so I cut in half and placed it strategically to give the appearance of something a bit larger.
For the inside of the card, I stamped my sentiment and cut it out with Die-Namics-Wellworn Die and Stamp Set.  I used a little twine and a small vintage Santa image popped up to finish it off.  Here is a close-up of the sentiment.
Now I'd like to show you the two different cards I made using the same Santa image.  They each have a very different feel...
 

One a bit more elegant in cranberry and gray tones...
 

And the other with an aged feel in a sepia tone pallet of off white, red and kraft.  Both cards make a big statement.  Which one is your favorite?  I can't seem to choose.  I actually made the Country Chic card to send to my grandchildren with the "Believe" sentiment and the cute Santa tickets.  :o)
 
Well, thank you for joining me today and I hope you enjoyed today's post.  I'll be back soon with another project to share!
 
Happy Holidays!
Merilee
 
Recipe:
 
Pattern Papers and Cardstock:  DCWV-The Downtown Love Stack, Main Street Stack; Me & My Big Ideas-Mambi Sheets; Recollections-Solid Cardstock
Stamps and Die Sets:  Flourishes-Santa I Believe-SS085, Sentimental Christmas-SS179; Whimsy Stamps-Holiday Ticket Sentiments-10210; MFT Stamps and Die-Namics Set-Wellworn
Embellishments:  K&Company BW Evergreen Adhesive Paper Borders; American Crafts Baker's Twine; Wrights-Loop Braid Trim; My Stash-Doily, Jingle Bell; Starbucks-Coffee Sleeve
Ink, Pens and Markers:  Tim Holtz Distress Ink-Brushed Corduroy, Festive Berries; VersaMagic-Jumbo Java; Stardust Galaxy Gelly Roll Pens; Sharpie Ultra Fine Point Markers
Adhesives:  Inkssentials Crackle Accents; Zig Two-Way Glue, Pop Dots; Glue Dots; Zots; Scotch- ATG, Mounting Tape
Tools:  Fiskars-Paper Trimmer, Easy Stamp Press; Scotch ATG Gun; Cutter Bee Paper Snips; Paper Shapers Circle Punch; Hole Punch; Martha Stewart Score Board; T-Square; Sizzix Big Kick Machine; Ink Daubers


Wednesday, November 28, 2012

Country Chic Christmas Card

Hi Everyone!  Hope this finds you all enjoying the holiday season! 

I've been shopping like a crazy lady, getting ready to host Christmas at my house this year!  I cannot wait--I am SOOOO excited!  My daughter and son-in-law and all of my grand kiddies will be here this year!  This will be the BEST CHRISTMAS EVER!!  :o)
 
This is my "country chic" Christmas card for today.  I used the same santa image as in my last post, but I colored them different.  The last one was in color and this one is in a sepia tone effect. I wanted to share more photos, but for now I seem to be out of storage here on google.  I will investigate the matter and get back to you.

I hope you've enjoyed my post for today.  Thank you for visiting my blog and I'll be back soon with another card to share.

Have a great day!

Merilee


Tuesday, November 20, 2012

Elegant Santa Christmas Card

Hello Everyone!  This week is Thanksgiving and I hope you are all enjoying the holiday season! 

We live far away from our family so we won't be celebrating with them this Thanksgiving.  Our kids may be grown now with families of their own, but my husband and I still have each other and we will have a cozy little Thanksgiving of our own, just the two of us.

When our home was bustling with children, I wondered what it would be like someday when our kids were grown.  I must admit that it can be lonely sometimes; however, there are wonderful things about it, too.  My husband and I really do enjoy each other's company and have lots of fun together.  Our life isn't quite as serious as it used to be when we were raising our family, which means we don't worry like we used to.  We are having fun dating again, too--something I thought was long over, and now we actually have time to stop and smell the roses!

We thank The Lord for our wonderful family and all of our beautiful grandchildren, but we are also thankful for our little family of two.  God has blessed us with so many gifts, and among them a most precious gift--the gift of us.  Together we've lived through a lifetime of experiences and we're looking forward to many more adventures to come! 

In the spirit of the holiday season, I'm sharing a Christmas card I made using one of the Santas that I shared with you in my last post here.  I decided to do an elegant card with this image and I really like the way it turned out.  I entered this card in the Cardz TV Design Challenge #21, "I'm Dreaming of a White Christmas".
My card base is a bit larger to accommodate the image and its mat.  I folded an 8-1/2x11 piece of cardstock in half to create a finished size of 5-1/2 x 8-1/2.  I used my Cricut Expression and Elegant Edges Cricut Cartridge-Stamp (Pg. 37) to create the "stamp" mat for Santa.  You can read more about that in my last post here.
Santa is mounted on foam tape to set him apart from the card base.  I also added two strips of silver embossed foil cardstock to the left edge, topped with a silver snowflake cut from a Martha Stewart punch.  A rhinestone was added to the center for a little sparkle.
Just right of Santa is matted cardstock tied with a bow.  I added two more rhinestone studded snowflakes, along with a small ornament that I cut with my Cricut Expression using the Christmas Cheer cartridge (HohohoS - Pg.89).  Here is a closer look:
The ornament base is cut from silver embossed foil cardstock and topped with a circle from black sparkle cardstock.  Centered on that is a Merry Christmas stamp from the Whimsy Holiday Postmark set.
For the inside of the card, I followed a similar layout to the card front.  The sentiment is stamped in black and embossed with silver metallic embossing powder.  Hopefully you can see the shimmer below...
For the right edge, I tied a small bow and added three rhinestones in graduating sizes.
 
Well, that's my card for today.  I hope you enjoyed it!  I'll be back soon to post another card using the same Santa image, only this time in sepia tone.  You can view the image in my previous post here.  I plan to do a card with an entirely different feel.  It will be fun to compare the two once I'm finished.

I'm sending you wishes for a warm and wonderful Thanksgiving, whether celebrating with a large family or simply among yourselves.  May God bless you all with health and happiness this holiday season!

I hope to see you again soon!  Happy Thanksgiving!

Merilee

Recipe

Cardstock:  Best Occasions Glitter Paper Pack; Fancy Pants Designs-My Family Collection; AC Specialty Paper-Foil; Recollections Cardstock; X-Press It-Blending Card
Stamps:  Flourishes-Santa I Believe SS085; Whimsy Stamps-Holiday Circle Postmarks
Inks:  Memento-Tuxedo Black; Tim Holtz-Black Soot, Festive Berries
Markers and Pens: Letraset Promarkers - Sets 1 and 2, Skin Tones and Skin Accents; Sharpie Extra Fine Point Markers; Sakura Stardust Galaxy Gelly Roll Pens and Classic Bright White Gelly Roll Pens
Ribbons and Cord:  Really Reasonable Ribbon-November Assortment; Cousin-Waxed Linen Cord
Embellishments:  Rhinestones-In Bloom by Bead Design; Snowflakes-Martha Stewart Snowflake Punch
Cricut Cartridges:  Elegant Edges-Stamp (Pg. 37); Christmas Cheer-HohohoS (Pg. 89)
Adhesives:  Zig 3-Way Glue Pen; Pop Dots; Zots Mini Glue Dots; Scor-Tape; Scotch Mounting Tape; Scotch ATG
Tools:  Tim Holtz Blending Tool; Martha Stewart Score Board; Fiskars Paper Trimmer; Fiskars Easy Stamp Press; T-Square; Ink Daubers; Heat Gun; The Paper Studio Paper Snips; Scotch ATG Gun; Becca's Peg Bow Maker; Martha Stewart Snowflake Punch; Martha Stewart Self Healing Mat; Bazzill Basics Splat Mat


Wednesday, November 7, 2012

Santa Image Stamps

Hi Everyone!  I hope this finds you all doing well on this rainy, chilly Wednesday in November.  With all this gloomy weather, I can't think of anything I'd rather be doing than working in my art studio!

Today's post is about different ways to use one stamp in order to achieve various diverse results.  In this case, I'm using the Santa stamp from "Santa I Believe" (SS085) by Flourishes.   You can purchase it here.  I bought this stamp set last year because I love the vintage feel of this Santa image.  It conjures up fond memories of when I was a little girl, anticipating Santa's arrival on Christmas morning!  Sorry, nostalgia has struck me as it always does at this time of year.  :o}

I began with stamping the image twice and used my Letraset Promarkers to color them in different ways.  I wasn't sure what I was going for, so I wanted to try a couple of techniques.  Here are my results:
And here are close-ups of each one...
The first is done in rather muted colors to create an aged appearance.
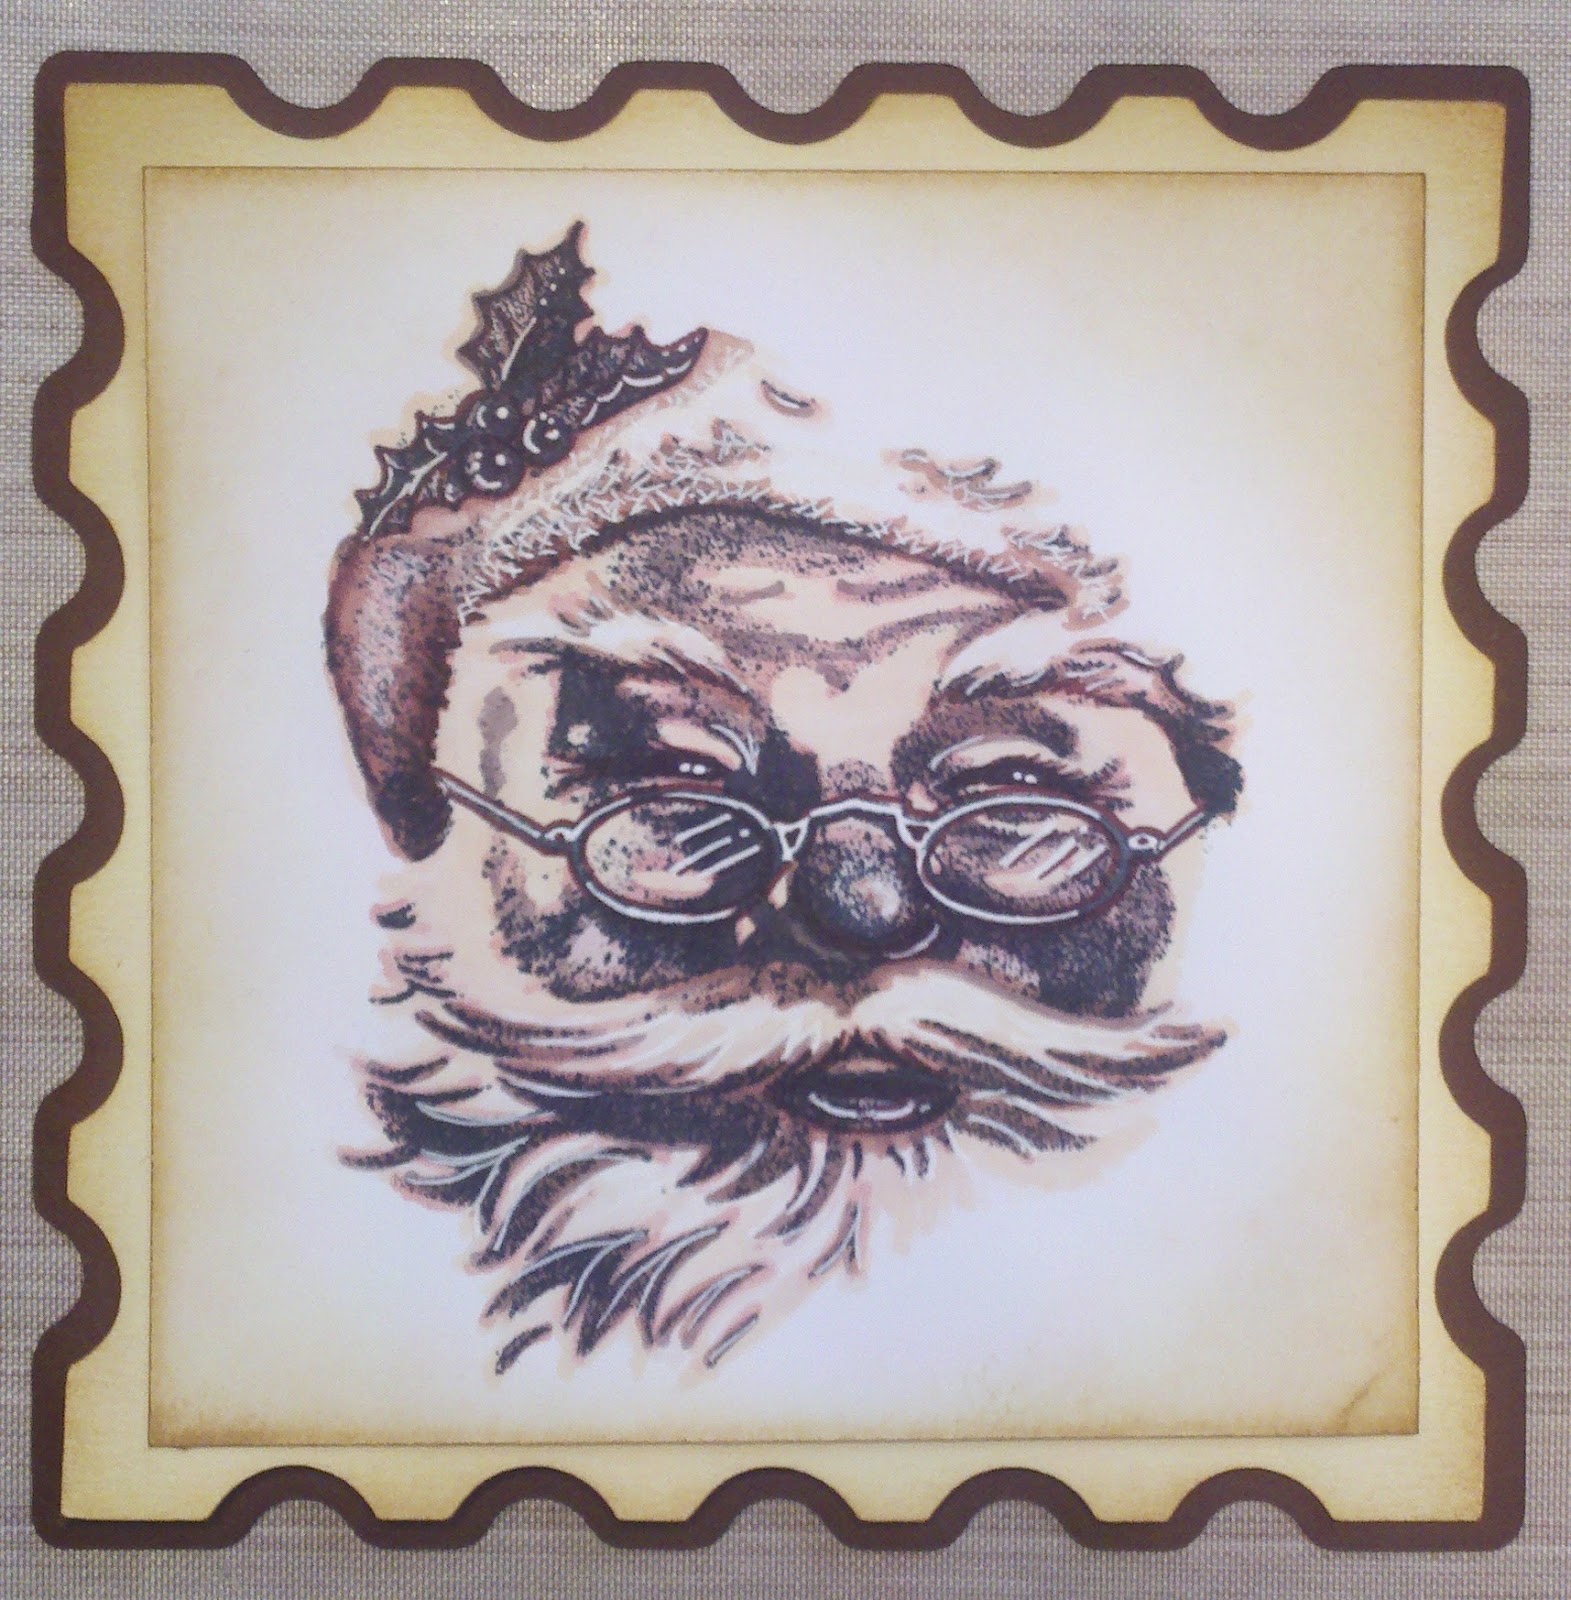
The second is colored to create a sepia tone effect.  I like both images and decided to create a unique mat to showcase them.  Here are photos of the matted images side by side:
I really love them both--each one has a different feeling, even though the image is the same.  Here are some close-ups:
The mat that I chose is from the Cricut Cartridge, Elegant Edges, Stamp (Pg. 37).  I cut it twice, once with the shift function in white cardstock and then with the shadow function in gray cardstock. Then I cropped the stamped image in a square with my paper trimmer to fit just inside the mat.  The edges are inked in Tim Holtz Black Soot Distress Ink.  I really love the way it enhanced the image.
The second mat is cut exactly the same, but I substituted cream and brown cardstock instead, even though I stamped the image on white.  Once I softened all of the edges with Brushed Corduroy Distress Ink, it unified the colors and brought them all together.  As you can see, I left just enough white to highlight Santa's face.

Today I will create the final cards using these as my focal images.  I've been toying with several ideas for card layouts and haven't been able to choose.  I don't know about you, but I sometimes need to separate myself from the project for awhile to gain fresh perspective. I will put it all together and share the results with you in tomorrow's post.

Thanks for stopping by today and I hope to see you again soon!

Merilee

Recipe:

Cricut Cartridges:  Elegant Edges - Stamp (Pg. 37)
Cardstock:  Recollections
Blending Card:  X-Press It
Stamps:  Flourishes - Santa I Believe #SS085
Ink:  Memento - Tuxedo Black; Tim Holtz Distress Ink - Black Soot, Brushed Corduroy
Markers and Pens:  Letraset Promarkers - Sets 1 and 2, Skin Tones and Skin Accents; Sharpie Extra Fine Point Markers; Sakura Stardust Galaxy Gelly Roll Pens and Classic Bright White Gelly Roll Pens
Tools:  Tim Holtz Blending Tool; Fiskars Paper Trimmer, Easy Stamp Press, ; Cutter Bee Paper Snips; T-Square; Martha Stewart Self Healing Mat; Bazzill Basics Splat Mat


Friday, November 2, 2012

Fun Halloween Photos to Share!

Hi Everyone!  Hope your Halloween was wonderful.  Can you believe it is November already?!?  Time sure does fly when you're having fun!

Today I'd like to share some pics of my sweet grandchildren.  They are Nana's little angels and they make my life wonderful!

From oldest to youngest, the first is Missy.  She loves cats so, of course, what else could she be??
Papa and I were out shopping one day and found this darling hot pink, sequined mask that we thought she'd love.
 

Next is Sissy.  She wanted to be an Egyptian and I can't imagine a cuter one!
We found this darling Egyptian headdress to go with her costume and thought it would be perfect.
 And here they are together...
You've all seen my fierce ninjago, Sammy!  He asked Nana to sew his costume this year and then he and his Mommy added the finishing touches.  Doesn't he look great?
And, last but certainly not least, is Baby Sissy!  Doesn't she make the cutest little cowgirl?  This was a costume I sewed for her big sister when she was little and it has been handed down to each girl to wear on Halloween!  :o)

I wish I could have been there to help them celebrate, but they live very far away.  At least I had an opportunity to take a small part in making their day great.  I always send them a treat box with lots of goodies and they carried their Halloween buckets to collect more candy. 

Being a grandmother is so much more than meets the eye--I just couldn't imagine life any other way.  I love each one of them so much.  They have very different personalities and are very special in his or her own way.  They have unique gifts to share with the world and bright futures ahead.  God has blessed us in so many ways with these little angels!

Thanks for stopping by today and sharing in such a special part of my life.  I hope to see you again soon with another project to share!

Merilee