Thursday, March 15, 2012

Easter Goodie Bag Toppers

Hello!  Happy Thursday!
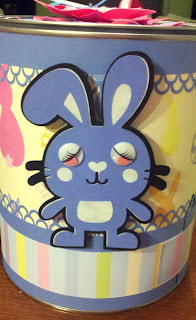
     As promised, today I am sharing the Easter goodie bag toppers that I made to go inside the kids' Easter pails.  To refresh your memory, here is another look at the Easter pails for my grand kiddies.  They were featured in yesterday's post.
     Each one has a different critter featured on their Easter pail, so I coordinated the critters on the goodie bag toppers so the kids don't get confused as to whose candy belongs to whom. 
     I purchased these Easter bags at the store some time ago (and I can't for the life of me remember which store...sorry!).  The toppers were easy to make.  I simply cut a strip of paper, punched the edge with my Martha Stewart punch, folded it in half and added a piece of patterned paper to the front.
     Next I cut a small critter to match the Easter pail.  For this one I added tiny eyes, but I mixed it up and did different eyes for each one.  After adhering the critter to the front of the topper, I filled the bag, folded the the bag over twice so it didn't open, and then I added the topper, securing it with my stapler.  Didn't they turn out so cute?
     Here is a sneak peek inside each one of the pails...
     We'll start with Missy's pail...and here is the inside.  If you look closely, you'll see that I included a clear tiny pail (which I found at Michael's) filled with jelly beans.  :o)
          Next is Sissy's pail and here's a look inside!  Those are baby bunnies, in case you're wondering, lol! (It's getting late here and I'm getting slap happy...)  :o}
     Little Sammy's frog pail turned out so cute, especially when you pair it with the darling little baby froggies inside!  I thought they looked even cuter with big eyes to match their daddy frog!  :o)
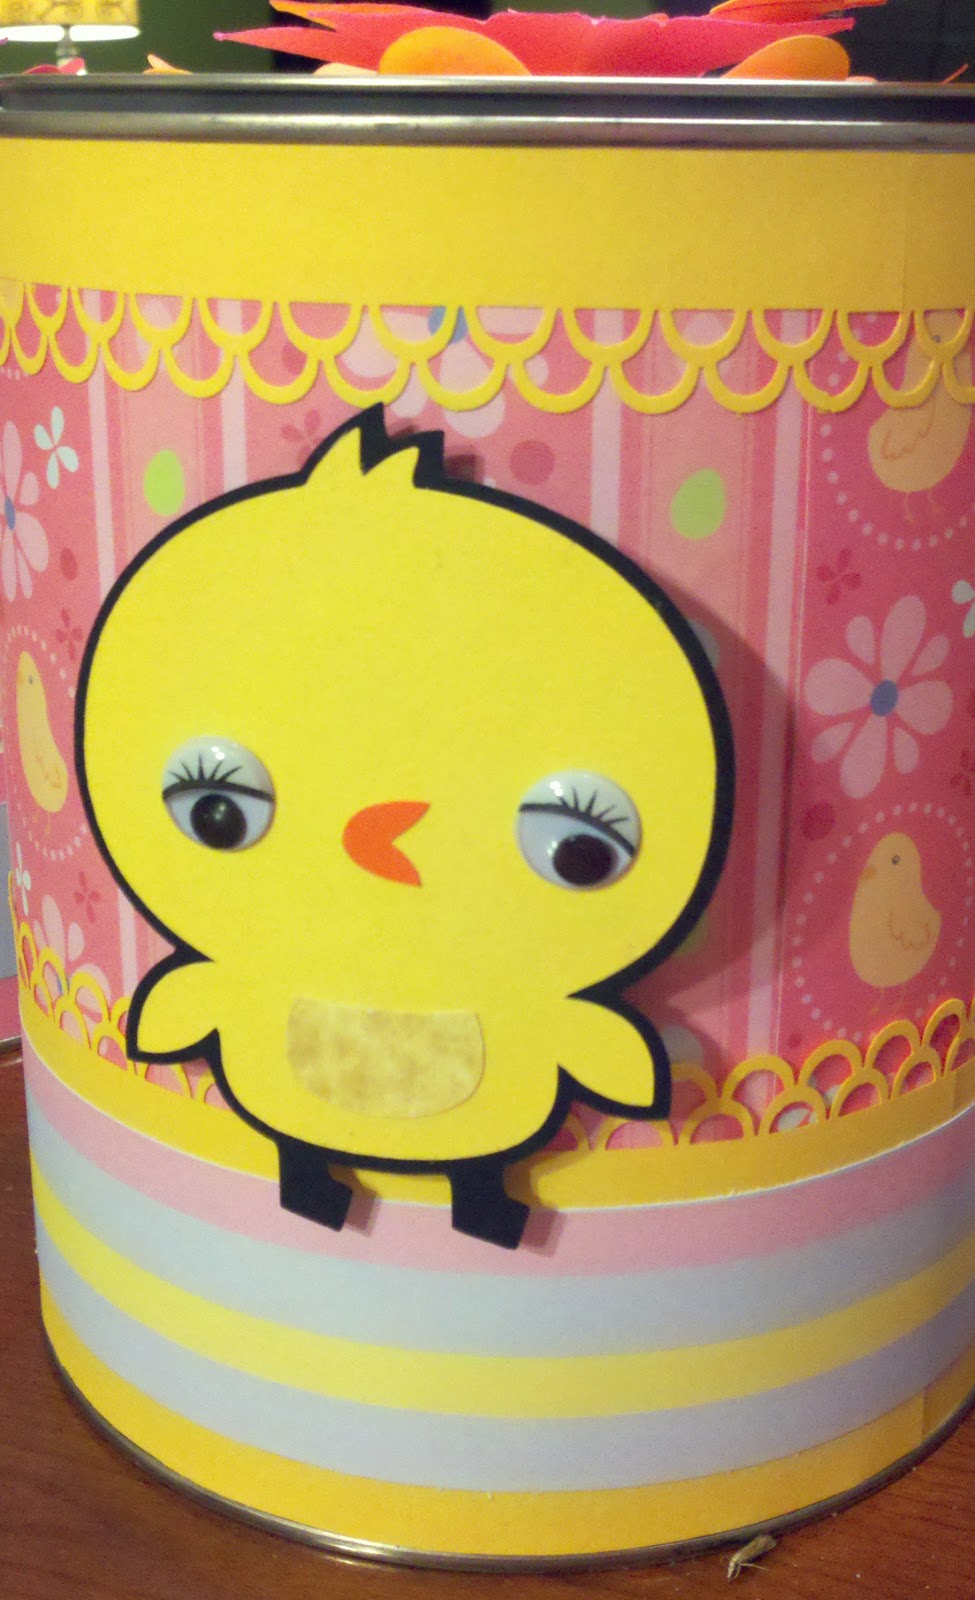
     And, finally, Baby Sissy's Easter pail with that cute little chick on the front...and who knew there were babies inside...a stuffed duckie AND a paper chickie!!  Baby Sissy's bag isn't filled with candy...no, she's got her tasty teething cookies and toddler yogurt bites in strawberry--her favorite flavor!  
     If you noticed the difference in the toppers at the beginning of the post and the ones inside the pails, the toppers at the beginning of the post were made for Mommy and Daddy's pails.  After all, I couldn't leave them out!!
     Well, this brings me to the end of my post for today.  I hope you enjoyed my Easter goodie bag toppers and hopefully you'll create some for yourself.  They are quick and easy and great for many different occasions.
     Have a wonderful day and I hope to see you again soon!

Merilee

Wednesday, March 14, 2012

Easter Pails

     Hi Everyone! Today I am featuring Easter pails that I made for my grandchildren. Sadly, my grandchildren live quite a distance from their Nana and Papa, and because of this I have to come up with creative ways to send them gifts for each of the various holidays.
(You can click on any of these photos for a closer look.)

     For Easter, of course my first thought was an Easter basket, but I realized that those baskets would be tossed around during shipping, their contents scattered about the inside of the box. I clearly needed something with a lid and these pails fit the bill perfectly.  
     Each pail began life as an unused paint can. You can find them at your local hardware or paint store. They were easy to repurpose for this project and the perfect containers to hold Easter goodies. 
     I started out by covering each pail in strips of coordinating patterned papers from the All Seasons paper pack by The Paper Studio. To frame them out I used solid cardstock punched with my Martha Stewart punch in hues to match the various color schemes.
     Then came the fun part! I knew right away that I wanted to use my Create A Critter cartridge for these. This cartridge has the cutest animals and there are so many to choose from!  :o)
     Each little critter was cut with my Cricut Expression using all of the various layers and then popped up on pop dots for dimension. I also added wiggly eyes to each one to make them all come alive. I purchase my wiggly eyes at Michael's, Hobby Lobby and Walmart.  They generally come in large bags containing all different colors, sizes and types.  Below are some close-ups:
     First up is the blue bunny. She is for my oldest granddaughter, Missy, whose favorite color is blue. The wiggle eyes are pink with eyelashes--aren't they so cute?!? I love the little heart-shaped nose on this bunny!  :o)
     Next up is the lavender bunny. She was made for Sissy, whose favorite color is purple, of course! These wiggle eyes are yellow with curly lashes, as well. You can see how dimensional they are when they are popped up from the background. They would have been adorable mounted on Action Wobbles, too!
     Since my grandson, Sammy, loves the color green, this darling little frog was the perfect choice, don't you think? His wiggle eyes are big, but don't have any girlie eyelashes, lol!  ;o)
     Last, but certainly not least, Baby Sissy's Easter pail was crying out for a darling little chick. Didn't she turn out cute?
     Mommy and Daddy's pails were done simply and cleanly.
     The lids needed a bit of embellishment, too, so I measured just inside the rim and, using my Cricut Expression, I cut large circles from each of the patterned papers. I then cut the flowers out using the Flower Shoppe cartridge in coordinating colors.
 
     The flowers were cut in various coordinating solids, but they would have been just as cute in patterned papers.  The edges are all inked and the petals curled.  
     As you can see here, the upper flowers are scored and folded in mountain and valley folds for plenty of dimension.  Each lid is topped off with a flat-backed glass pebble, which is backed with coordinating polka dot patterned paper from The Classic paper collection by The Paper Studio. I used hot glue to secure the flower layers and the glass pebbles.  
     You might be able to see in this photo that the pebbles act as both a flower center and a handle for the lid. 
     The tags were cut from the Tags, Bags, Boxes and More cartridge and left relatively plain so as not to compete with the fancy design of the pails (not to mention that Nana was quite tired and running out of steam by then, lol!)
     You can't see them in any of these photos, but I included a paint can opener with each Easter pail so the kids could actually get to the goodies inside.  I simply created a paper pocket on the backside of each pail to hold it and I attached ribbon to the top of the opener to pull it out (and help keep it from getting lost).  I apologize for not including photos of this part of the project...I forgot...my bad!
     I hope you have enjoyed this Easter project.  It was fun to "think outside the box" and use something unexpected.  As you all know by now, I love to upcycle and recycle, so this project was right up my alley!  :o)
     In my next post I will show you the contents of these pails and the bag toppers I made to coordinate with each child's critter.  Until then, have a great day and I hope to see you soon!

Merilee


Saturday, March 10, 2012

Free Standing Pop-Up Card

Hello Everyone!  Happy Saturday to you! 
Today's featured card is a free standing pop-up card. It is super simple to make! I found the instructions at the Splitcoast Stampers website here.
In making this card, I wanted to make a birthday card for my youngest little granddaughter that could be displayed on the shelves in her room, since each of her sisters and brother have their cards displayed in their rooms.
This is a unique card, in that it folds flat to put in an envelope (hard to see in this photo) and then pops up to stand alone.
To make this card, I used my Cricut Imagine machine.  I love it because it really does make card making quick and easy.  The cartridges I used for this card are Kate's ABC's and Imagine More Cards.  

The card base was created as per the instructions here.  Once that was done, I cut the tag to insert in the middle of the base from the Imagine More Cards cartridge (page 23). Each piece was filled with various patterns as I went along.
This little girl, along with her background, is from Kate's ABC's (page 60).  This is such a darling cartridge.  I bought it specifically to make things for my newest granddaughter.  :o)  Each piece was cut and filled with colors and patterns from the Imagine More Cards cartridge.  

After gluing everything in place, I chose to add some detail with my markers by drawing in the kitty's face, outlining the butterfly and adding sprigs of grass here and there.  Also, if you look closely, you'll see the little girl's shaded coat and hat, details in the little girl's hair, as well as the kitty-cat's body.  When I was satisfied, I added a purchased ribbon flower from my stash. (You can find these ribbon flowers in the bridal department of your craft store.)
As you can see from this photo, ribbon and rickrack trim were added to the tag topper, as well as a pink flower eyelet from which the pretty ribbon is threaded and tied at the top with a pale pink satin ribbon.
Since this was my granddaughter's very first birthday, I added the cupcake with just one candle on the front (found on page 2 of the Imagine More Cards cartridge).  I printed and cut this as one piece, and then printed and cut it again in pieces so I could pop the cupcake up on an Action Wobble.  Below is a better view...
Lil' Sissy learned to flick the cupcake with her finger to get it to wobble back and forth. :o)
There actually is a place to sign the card--here is a view from the back.
Hope you enjoyed my card for today.  If you have an opportunity, try this fun, interactive card for yourself.  It is a great little card and can be used for so many different occasions and it works well with your Cricut!  :o)

Have a great weekend and I hope to see you again soon!

Merilee

Wednesday, March 7, 2012

April Fool's Day Hidden Message Slider Card-CCI Blog Design


Hi everyone!  I thought I'd share my design for the Creative Critterz Imaginations blog. The theme for my design is all about April Fool's Day.  I have to admit, this was one of the hardest designs I have done...ever!!  For the past week or more I have been going crazy thinking about what I could possibly design for April Fool's Day and I finally came up with this greeting card.
This is a hidden message slider card.  It features two "windows", one above the other.  When you pull the tag at the top, the bottom window slides up over the top window, exposing a hidden message.
The base was fairly easy to make--it was the content that had me stumped!  I surfed the net for April Fool's ideas over and over again, to no avail.  I finally began looking through some of my cartridges and thought it would be fun to use The Good Old Days for this card.
This announcer was perfect for my April Fool's Day gag.  I was thinking along the lines of an old fashioned radio game show host.  (No, I'm really NOT that old--I watch lots of Turner Classic Movies, LOL!)  I found the "This Just In" banner on the cartridge, but I used Word to create the "You have won a Free Trip" banner.
I couldn't resist using this car and camper!  "Family Vacation" was part of this image, but I printed and cut the pieces separately so I could arrange them to fit in this small space.  The car and camper printed as solid brown images, so I used my markers to add interest, taking cues from the details shown in the background papers, and then popped the whole thing up for dimension.
It really is a fun, interactive card with the hidden message that appears on the bottom panel.  Below is a close-up of the hidden message.  I used Word to create the "April Fool's" banner.
If you look in the cartridge book, you will find that this image is actually of a man eating a piece of cake.  However, I needed him to be speaking through a megaphone, so I used my markers to magically transform that piece of cake.  ;o}  Here's another view...
If you are interested in making a hidden message slider card, you will find the instructions at the Splitcoast Stampers website here.  There are also several video tutorials on youtube.com.
I hope you enjoyed my take on an April Fool's Day card.  If you enjoy all things retro like me, I highly recommend The Good Old Days cartridge.  There are lots of super cute images and background papers.  I just love it!

Thanks for stopping by today and I hope to see you again soon!

Merilee