Wednesday, January 25, 2012

Valentine Candy Box Card with Creative Critterz Imaginations

Hi Everyone!  Today was my first post as a design team member over at the Creative Critterz Imaginations blog.  I shared a Valentine Candy Box Card that I did with my Cricut Imagine.  I hope you go check it out for all of the details.  You can see is here.


As a continuation of that post, I wanted to show you all the ways you can use this card base to meet your needs.  

I originally found this tutorial at the Whiff of Joy Tutorials and Inspiration blog here while looking for a unique gift idea for Christmas.  In addition to having darling stamps, they've got all kinds of ideas for great gifts.


This card base was originally designed to accommodate tealight candles, which fit perfectly inside the box.  However, I thought they would make great little candy boxes to give as gifts at Christmastime.  Some of these cards contain gift cards and other surprises, too, as you will see below.  I will go through each one of these to show you a few of the details.


First of all, each one of these cards were made solely using the pretty patterned papers contained in one paper pad:  the Holiday Stack by DCWV.  I used very few embellishments, since the papers were so ornate.  I used just a few rhinestones, ribbon, snowflakes and buttons.  Everything else was fussy-cut from the papers. 

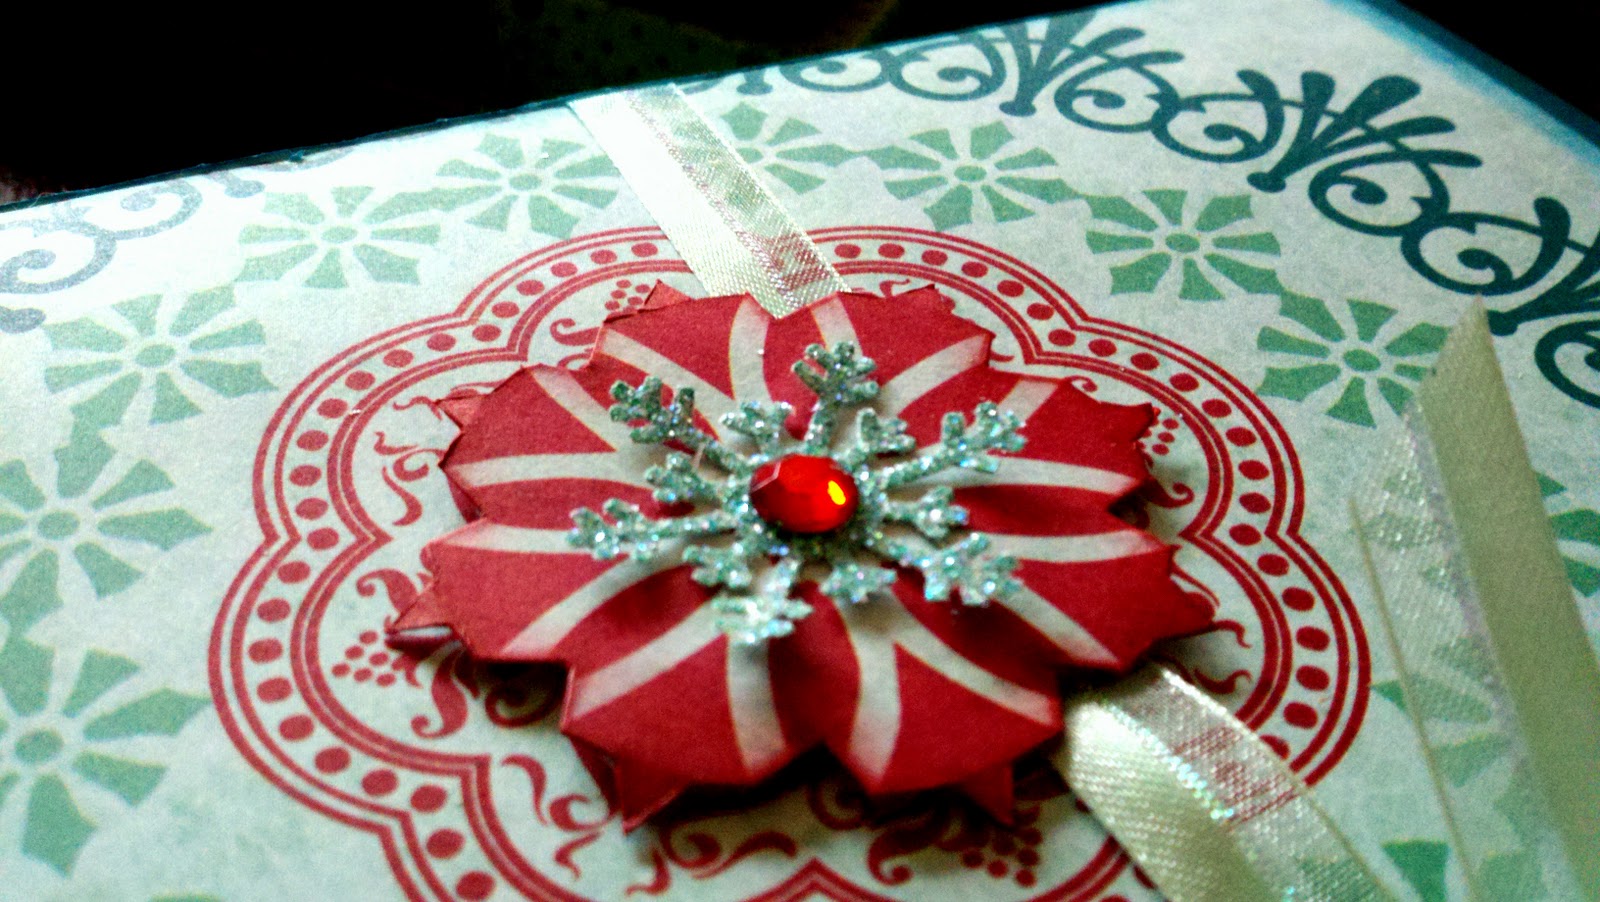
After fussy-cutting the flower on the front of this card, I outlined and shaded it in various places, popped it up in sections, and topped it off with a rhinestone.


As you can see, this particular card holds an envelope, but what's inside is a surprise!  I cut the envelope with my Cricut and Tags, Bags, Boxes and More cartridge just the right size to hold a card with a necklace attached.  The inside is covered completely with coordinating patterned papers, and I chose a separate pattern to highlight the candy box in each card.


The next card was finished to lend a bit more of a masculine vibe...


Again, the leaves were fussy-cut and popped up.  I also added some sparkly snowflakes in different colors, as well as some cute buttons and berries.


This card doubled as both a Christmas gift, as well as a birthday gift.  The envelope that holds the gift card has a button closure with twine that wraps around.  Dimensional glue dots are perfect in this application, since the glue dot not only pops up the button, but it also serves to hold the twine in place so it doesn't come unwound.


This card is feminine, with poinsettias fussy-cut from the paper.  My Martha Stewart punch is perfect for punching sparkly snowflakes for the centers.  


You can see the flower detail above, as well as the inside detail.  I just love how versatile these cards can be!  You can tweak the size of the box to fit virtually anything you like.


This card has more of a wintry theme, rather than being so closely associated with Christmas.  Perfect for winter birthdays, which is what this card was for!  :o)


I wish you could see them in person--photos just don't do them justice.  The patterned papers are so pretty and vibrant.  This envelope is simply held closed with a tiny bow.


The final card did double-duty as necklace holder, too.  Again, the center medallion was fussy-cut and popped up for dimension.  Another snowflake and rhinestone in the middle set it off just perfectly, don't you think?


These candy box cards are so fun to make and everyone really enjoyed receiving them as gifts.  They are a great way to show you care in a simple, informal way.  I hope you give them a try!

Thank you for stopping by today!  I'll be back again soon with more ideas and inspiration.  Have a great day!

Merilee


Friday, January 20, 2012

Altered Wooden Frames

Hi everyone!  Hope your day is going great.  Mine has been busy, to say the least, but busy is always great.

Today I am sharing a project that is near and dear to my heart.  I absolutely love dogs (and cats...and all animals, in general, lol!) and I made these special, altered wooden frames as gifts for my cousin who shares my love in all things furry.


These were made as a set of three to be hung side by side.  My cousin, John, is a bachelor (an "eligible" bachelor, by the way) and has an outdoor theme in his home, so I grabbed a paper stack dedicated to our furry friends entitled, The Pets Stack, by Die Cuts With a View, and chose my background papers accordingly.  These frames feature my cousin's furry family (from left to right), Jessie, Dagny and Polly.  Aren't they adorable?


I began this process with three raw wood frames that I found in the clearance bin at Michael's for a dollar each.  Before I did anything else, I stained the front and sides with wood stain.  Once the stain dried, I turned the frame upside down, laid it on top of the 12 x 12 patterned paper, and traced the inside opening.  I then cut the paper to fit.  In order to get good adhesion to the frame, I grabbed my Mod Podge, coated the entire front of the frame, and applied my patterned paper.  I then smoothed it out very carefully to avoid any air bubbles, much the way you would when wallpapering. 

At this point I borrowed my husband's file and rasp from his toolbox and began to rough up the edges all around the inside and outside of the frames.  This added a rustic feel, as well as filed off any paper hanging over the edges.  Once I had it adequately distressed, I coated the edges with a bit more Mod Podge to seal them, leaving the face of the frame clean.


This is where the fun began!  I tied twine around the frames in various places and attached Tim Holtz corners with hot glue.  My husband very kindly drilled holes through the frames and attached the three knobs I had found on clearance at Hobby Lobby.  He was careful to countersink the hardware on the back of the frame so it would lie flat against the wall.  From there, I inked all of the edges, inside and out, as well as inking the twine here and there to add a bit of age.


Around each knob I hung Tim Holtz charms, being careful to choose the perfect statement unique to each dog.  In this case, Dagny's charm says "cherish".  I then opened my bin of silk flowers, dug out some acorns I had found on a nature walk one day and, with glue gun in hand, had the time of my life decorating the frames!  Incidentally, my husband nervously watched over me, making sure I didn't make them too girlie, lol!


The Milk Bones on each frame are real Milk Bones with a coat of Mod Podge over top and inked with various Tim Holtz inks until they looked perfectly toasted.  I probably could have toasted them in the oven, lol!


Jessie's frame has an "inspire" charm hanging from her knob.  She's also got little acorns here and there.  The twine on this frame is wound around the frame vertically.


The knob and hanging charm on Polly's frame say "destiny" and are placed on the opposite side.  As you can see below, the twine was actually wrapped in an "x" pattern through the center and around the other side.


I used Rub 'n Buff  Metallic Finish to adjust the patina of the metal knobs so they would more closely  blend together.  The corkscrew twine was made by tightly wrapping it around a skewer and heating it in my oven at 325 degrees for about 25 minutes.


I love the various flowers, berries and leaves, with acorns mixed in here and there--it's all so earthy and gives these frames a true outdoor feel.


And, the Tim Holtz corners not only serve a decorative purpose, but also further secure the paper to the frame on each corner.

Last, but certainly not least, these frames did not come with glass, so my husband was kind enough to search through his stash of plexiglass and cut three pieces to fit each one.  I used glazing points to snug up the plexi and sealed the edges with hot glue.

Well, that just about does it for this project.  I hope you enjoyed my altered wooden frames.  I'll be back again soon with another project!


Merilee

Wednesday, January 18, 2012

Corner Bookmark Card

Hello!  How is everyone on this fine Wednesday?  I hope this finds you all well and busily enjoying your day!

Today I have a corner bookmark card to share with you.  This is one of my all time favorite cards--I love the concept.


As you can see, it is a masculine card with the airplanes featured on the front, but it is also a useful card, which makes it a favorite of mine.  Instead of collecting dust or ending up in a keepsake box, or worse--a trash can (yikes) like so many other cards  :-O, this card can actually be put to good use once opened...and that makes me happy!


The construction of this card begins with a postcard base made from Kraft cardstock.  The papers used are from the Traveler Specialty Cardstock Collection by Me & My Big Ideas.  I bought this paper pack because of its uniquely masculine designs.  I love the maps and airplanes, especially since I was raised in and around the aircraft industry and then married a man in the industry, too, lol!

I found a great tutorial on youtube by jillsink1, which features a corner bookmark card.  Now, if you view this tutorial, you will see that I did not follow Jill's instructions at all...I can't help it, I can never follow creative instructions.  No matter how hard I try, I always seem to veer off course into my own direction, adding and/or subtracting along the way.  It is a default in my circuitry which I just cannot seem to correct.  However, having said that, I actually LOVE the way this card turned out and, better yet, it is uniquely mine, so that makes it all better!  :o}


Okay, back to the card...you can see there are several layers to this card.  I covered my card base with patterned paper matted twice--first in gray and then in blue, and then stamped a sentiment on a banner label cut by hand using the Foot Longs stamp set by Hampton Art.  (To save time, you could easily use your Cricut machine for this banner label.)  

I then searched my scrap bin to find a suitable piece of sturdy acetate and cut a piece to fit the front of my card base.  This particular acetate is recycled from the Cricut blister packaging (I never throw anything away--another default in my circuitry, lol!).   Using the star border from the Cuddlebug Measure by Measure embossing folders, I ran the acetate through my Big Kick machine to emboss and then poked holes through the center three stars through which I attached my tiny star brads.  I was a bit surprised at how easily this acetate was embossed and what a great impression it took from the folder!  

Once that was finished, I adhered the acetate to the bottom of my card using Scor-Tape for a secure bond, since that will be the only place in which the acetate will be held to the card.   Then I adhered my label over top to hide the bond and further secure the acetate to the card.  Isn't that paper clip cute?  I confiscated that from my husband's stash, lol!


On the upper edge of the acetate, just over top of the main focal image, I stamped my sentiment with the Hero Arts, CL156 stamp collection.  I always use StazOn Ink when stamping over top of non-porous surfaces such as acetate.  Once I was finished, I adhered black corners to define the airplane underneath the acetate.  Note:  As stated above, the acetate is only secured at the bottom of the card base.


In these photos, you can see the front (right) and the back (left) of the corner bookmark.  As you can see, the bookmark slips over the corner of the book page.  In this instance, it will slip over the corner of the acetate to be the focal point of the card.  (If you click on any of these photos, you can get a closer look.)


Here you can see what it looks like finished.  If you look closely, you can see that the photo on the bookmark is the same image featured on the card base.  I cut them to match up exactly when the bookmark is in place.


I will feature the bookmark with all of the details in tomorrow's post, along with a link to a youtube video tutorial.  In the meantime, I hope you enjoyed my card!


Thank you for joining me.  Have a wonderful day and I'll see you again tomorrow!

Merilee

Tuesday, January 17, 2012

2012 Creative Critterz Imaginations Design Team Member

Hello Everyone!

Just popping my head in this afternoon to share some good news.  I am delighted to announce that I have been selected to serve on the 2012 Creative Critterz Imaginations Design Team.  The announcement was made on January 13th here.  I had to pinch myself to make sure it was true, lol!  Could my name really be listed among those who were chosen??  There were so many creative submissions from some very talented people and I was truly humbled and delighted.

If you've never been to Creative Critterz Imaginations, I suggest you visit soon.  There are so many projects and tutorials on this blog.  For those of you who use a Cricut or Cricut Imagine, it is a great place to go for lots of inspiration and ideas.

This will be the very first time I have participated on a design team and I couldn't be more excited.  It will give me an opportunity to spread my creative wings a bit more.  I am so excited and cannot wait to begin!  It is my sincere hope that you will join me on my creative journey as I take my first steps designing for Creative Critterz Imaginations.

Wish me luck!  :o)
Merilee

Monday, January 16, 2012

Another Criss Cross Card!

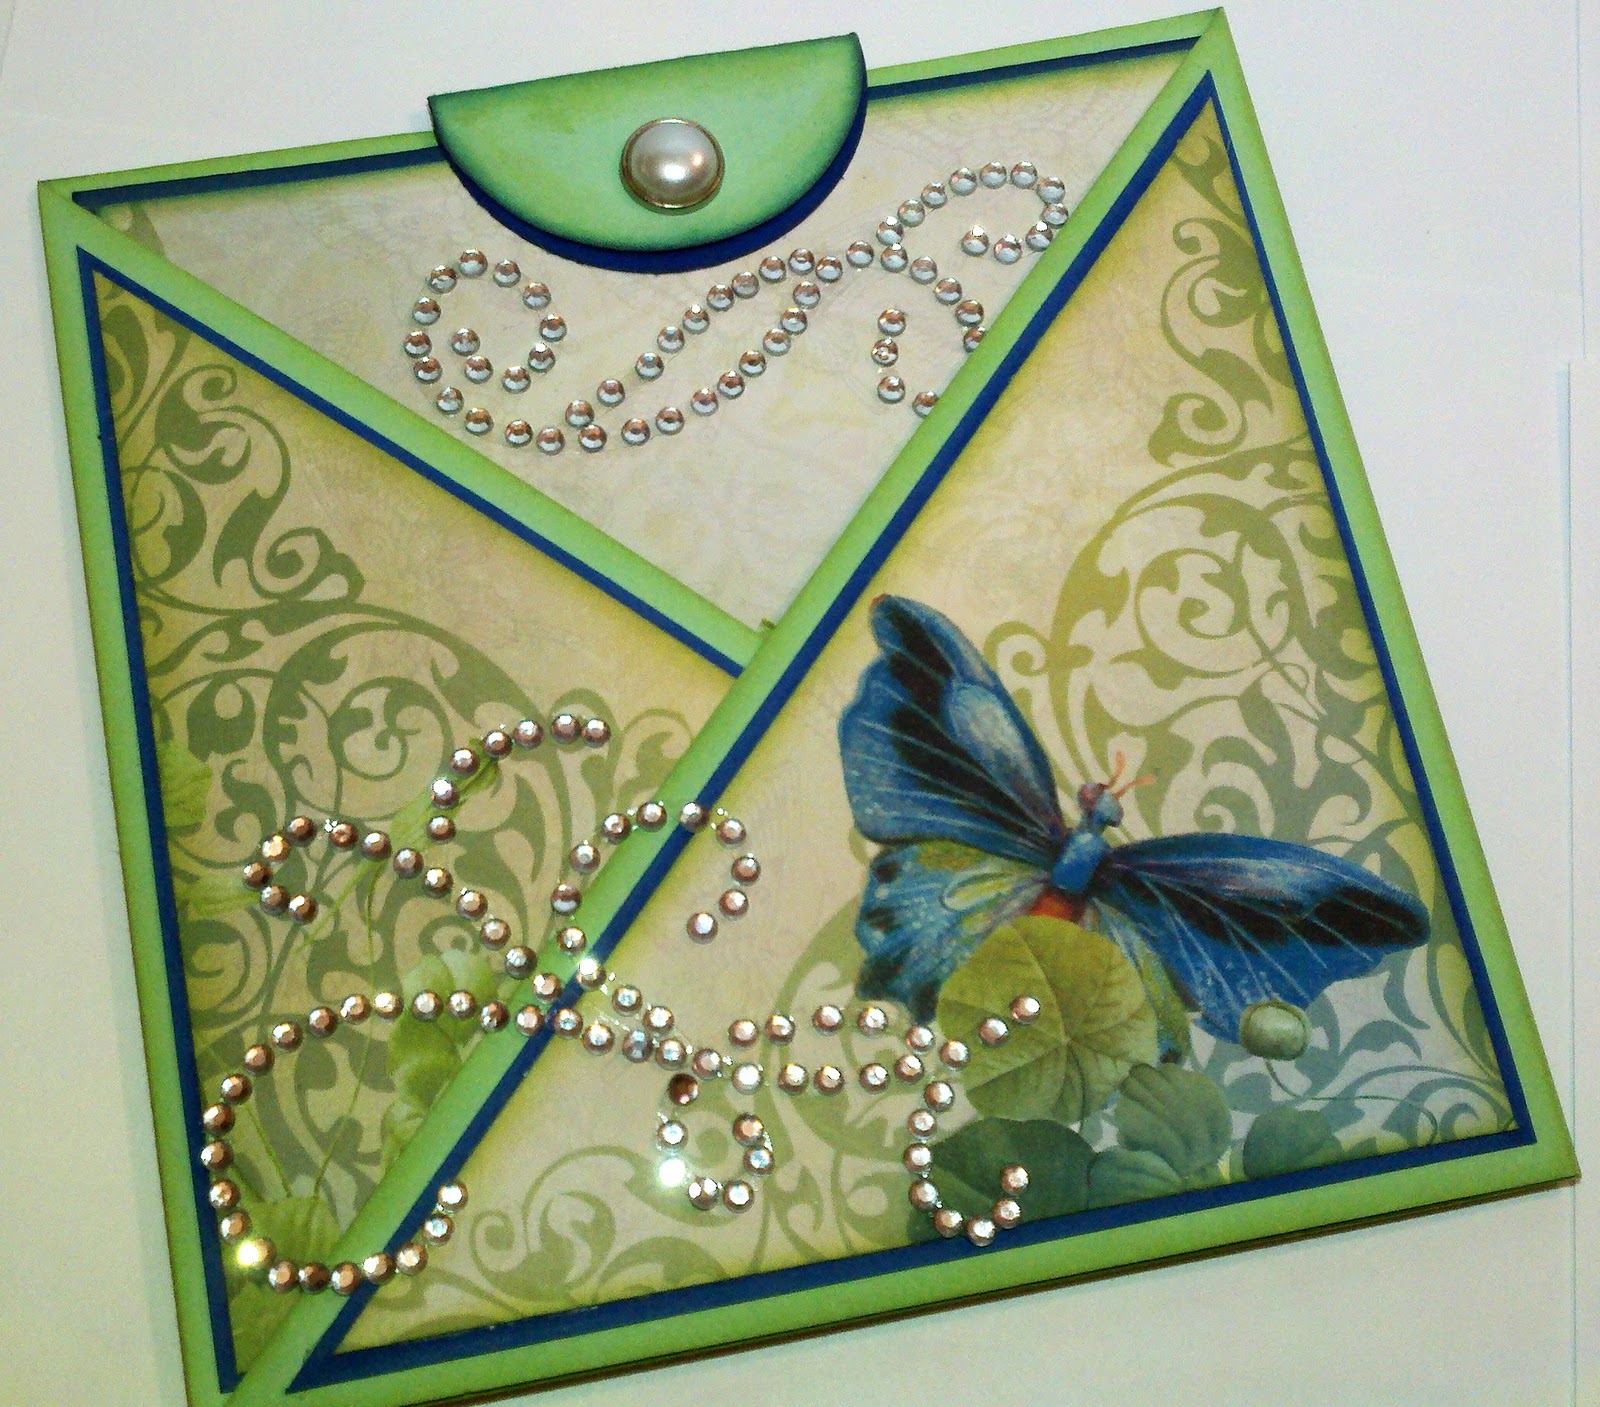
Hi Everyone!  I'm back today with another quick criss cross card.  These are so easy to create and, depending upon the papers you choose, you can make quite an impact.


The papers used for this card are from the Mariposa Paper Stack by Die Cuts With a View.  Aren't they beautiful?  I just love the colors!  I chose this pretty shade of green for the card base and matted everything in this coordinating blue.  All of these colors compliment one another so beautifully, don't you think?  Both shades of solid cardstock are from Micheal's Recollections line.


In case you missed my last one, the criss cross card consists of a criss crossed envelope with a postcard style insert.  I used a bit of bling to show the butterfly in flight, but chose to stay with clear rhinestones since the colors in the various papers are so soft and beautiful.


Once the card is removed from the envelope, you really begin to see this beautiful patterned paper.  I just love how the colors pop from the page, yet the images are soft and pretty.  


The sentiment is from the Marcella Howley Collection by Flourishes and came in an Easter pack; however, I thought this sentiment was perfect for a sympathy card, as well.  Again, I stayed with clear rhinestones since the paper is so lovely.  It really didn't need anything further to set it off.


As always, the back of the card should be just as pretty as the front, so a bit more bling and a tiny butterfly to go along with my business stamp.


This card was actually made using one 12 x 12 sheet of paper.  A different pattern was in each corner of the sheet, so I cut the paper in sections, using each different corner as a feature in various places on my card and envelope.  It's amazing how far one 12 x 12 sheet of paper can actually go, so don't be afraid to buy the larger paper packs for your cards.  The images are larger and really do make quite a statement.


I just love the colors in this card.  The blues and greens are so soothing and the papers in this collection are so beautiful.  I will definitely use this paper stack again!

Have a wonderful day and thank you so much for stopping buy!  I'll be back soon with another creation to share with you!

Merilee

Sunday, January 15, 2012

Masculine 60th Birthday Card

Hi Everyone!  Hope your Sunday has been relaxing and enjoyable.

Today I'd like to share a masculine card made for a 60th birthday celebration.  I made this card using my Cricut Expression and the Wild Card cartridge.  This cartridge has so many fun little cards to make!


For this card I used a craft card base.  If you look closely, you will see that this image appears as though it has a torn edge.  I really liked this edge and took it one step further with my inks to create an edge that appeared to be burned.  


I used the card feature on Page 66 to create this masculine card.  The fish were cut and sketched in with my pencils to add detail.  I then used chalks to add shading and highlights.  The cattails were cut from a sheet of cork for added texture.  I held my breath when I put that cork in my machine, but it cut just perfect!  I used twine from which to hang the fish.


The inside of the card features the window "casing", as well as a pocket holding two stamped tags.  The sentiment stamps used for this card are from Hero Arts, CL148.


The pocket was stitched with my sewing machine and I added a small button for a little extra detail.


The tags were cut from my Tags, Bags, Boxes and More cartridge and have blue ribbon threaded through and secured with a staple at the top.  I used the sentiment stamps for the "celebrate" tag, but for the "you're 60" tag, I carefully hand wrote the words and numbers, trying to duplicate the same font.  I think I got pretty close, all in all.

I try to coordinate my business stamp with the card's overall scheme.


It is always fun to create matching envelopes.  As long as I can remember, I have always been a stickler for coordinating envelopes, lol!  Long before I had my Cricut, my husband used to lose patience with me in the store when I took extra time to find the perfect envelope to match my card--a plain white one would never do, lol!  

Didn't this envelope turn out cute with the twine stitched across the back flap?  :o)  The front of the card was finished similar to the tags inside, since I knew it wouldn't be mailed.


Well, I hope you enjoyed my card for today!  I'll be back soon with another creation!

Merilee

Saturday, January 14, 2012

Birdcage All Occasion Card

Hello everyone!  Hope your Saturday has been wonderful.

Today's post is another Cricut Expression project.  This time I used Bloom, which is a Cricut Lite cartridge.  It has a lot of cute images, but I happen to love birds and birdcages, so this is the one I chose.


The colors I chose for this card are a bit different--even a little bohemian.  I pulled all of them from the patterned background paper from the Poteeka Souffle paper pad by The Paper Studio.

I began with my base card in an olive tone cardstock--again, something I would never ordinarily choose, but I decided to just go with it and see where it took me.  I then created a border with my paper punch for the bottom in a lighter, brighter green of the same color family, and layered it on top of a scrap of hot pink.  The darling patterned paper is set above, and the whole thing is matted on a metallic charcoal gray cardstock--yet another choice that is way out of my comfort zone, lol!

To make the transition between different papers, I added a wide, hot pink ribbon base, and then two shades of orange ribbon on top of that.


The birdcage itself is cut in two layers.  The shadow layer was cut from a sparkly, gun metal cardstock (from Walmart), and the upper layer from a solid pink.


As you can see from this photo, I embossed the entire pink layer with my embossing powder and heat gun in order to create a sharp contrast from the sparkly shadow beneath.  I then mounted the entire cage on foam tape to lift it from the page.

The bow was tied with two ribbons--a pale peach and a bright orange.  I then accented the cage in various places with flat-backed pearls which began as white, but were easily colored in with markers to match my color scheme perfectly.

The birdcage image appears in the booklet with flowers in the lower left-hand corner, but I decided to forgo cutting the flower layer and, instead, add brightly colored daisies.  The leaves behind are velvety to add yet another texture.


The inside of the card showcases darling little birds.  This is one of the coordinating patterns in the Poteeka Souffle paper pack.  I just couldn't resist using this paper--these little birds are so cute!


The bird in flight was fussy-cut from the pattern and popped up on foam tape.  The added bling helps set her in motion!  :o)

Had I been pressed for time, I could easily have cut a darling little bird with my Cricut machine.  There are numerous cartridges with plenty of birds to choose from.


To the side of the little bird, I placed some dimensional stickers I found in the dollar bin at Michaels, with the middle sticker atop a little pink daisy.  I just love friendly little daisies!


If you look closely, you will see that there was no bright orange in the patterned paper, so I simply outlined some of the birds with my orange marker to blend it all in with my color scheme.  I do that quite often when I want to add a little bit extra here and there.


On the back of my card, I always stamp my business stamp on coordinating cardstock to match the overall theme.


This was a super fun card to create and I really enjoyed making it.  My Cricut machine makes it so easy to cut pretty shapes to create a card just perfect for any occasion!


Thanks for visiting today and I hope you join me again soon on another project!

Merilee