Hi Everyone! I hope this finds you all doing well on this rainy, chilly Wednesday in November. With all this gloomy weather, I can't think of anything I'd rather be doing than working in my art studio!
Today's post is about different ways to use one stamp in order to achieve various diverse results. In this case, I'm using the Santa stamp from "Santa I Believe" (SS085) by Flourishes. You can purchase it here. I bought this stamp set last year because I love the vintage feel of this Santa image. It conjures up fond memories of when I was a little girl, anticipating Santa's arrival on Christmas morning! Sorry, nostalgia has struck me as it always does at this time of year. :o}
I began with stamping the image twice and used my Letraset Promarkers to color them in different ways. I wasn't sure what I was going for, so I wanted to try a couple of techniques. Here are my results:
 And here are close-ups of each one...
 The first is done in rather muted colors to create an aged appearance.
 The second is colored to create a sepia tone effect. I like both images and decided to create a unique mat to showcase them. Here are photos of the matted images side by side:
 I really love them both--each one has a different feeling, even though the image is the same. Here are some close-ups:
 The mat that I chose is from the Cricut Cartridge, Elegant Edges, Stamp (Pg. 37). I cut it twice, once with the shift function in white cardstock and then with the shadow function in gray cardstock. Then I cropped the stamped image in a square with my paper trimmer to fit just inside the mat. The edges are inked in Tim Holtz Black Soot Distress Ink. I really love the way it enhanced the image.

Today I will create the final cards using these as my focal images. I've been toying with several ideas for card layouts and haven't been able to choose. I don't know about you, but I sometimes need to separate myself from the project for awhile to gain fresh perspective. I will put it all together and share the results with you in tomorrow's post.
Thanks for stopping by today and I hope to see you again soon!
Merilee
Recipe:
Cricut Cartridges: Elegant Edges - Stamp (Pg. 37)
Cardstock: Recollections
Blending Card: X-Press It
Stamps: Flourishes - Santa I Believe #SS085
Ink: Memento - Tuxedo Black; Tim Holtz Distress Ink - Black Soot, Brushed Corduroy
Markers and Pens: Letraset Promarkers - Sets 1 and 2, Skin Tones and Skin Accents; Sharpie Extra Fine Point Markers; Sakura Stardust Galaxy Gelly Roll Pens and Classic Bright White Gelly Roll Pens
Tools: Tim Holtz Blending Tool; Fiskars Paper Trimmer, Easy Stamp Press, ; Cutter Bee Paper Snips; T-Square; Martha Stewart Self Healing Mat; Bazzill Basics Splat Mat
Today's post is about different ways to use one stamp in order to achieve various diverse results. In this case, I'm using the Santa stamp from "Santa I Believe" (SS085) by Flourishes. You can purchase it here. I bought this stamp set last year because I love the vintage feel of this Santa image. It conjures up fond memories of when I was a little girl, anticipating Santa's arrival on Christmas morning! Sorry, nostalgia has struck me as it always does at this time of year. :o}
I began with stamping the image twice and used my Letraset Promarkers to color them in different ways. I wasn't sure what I was going for, so I wanted to try a couple of techniques. Here are my results:


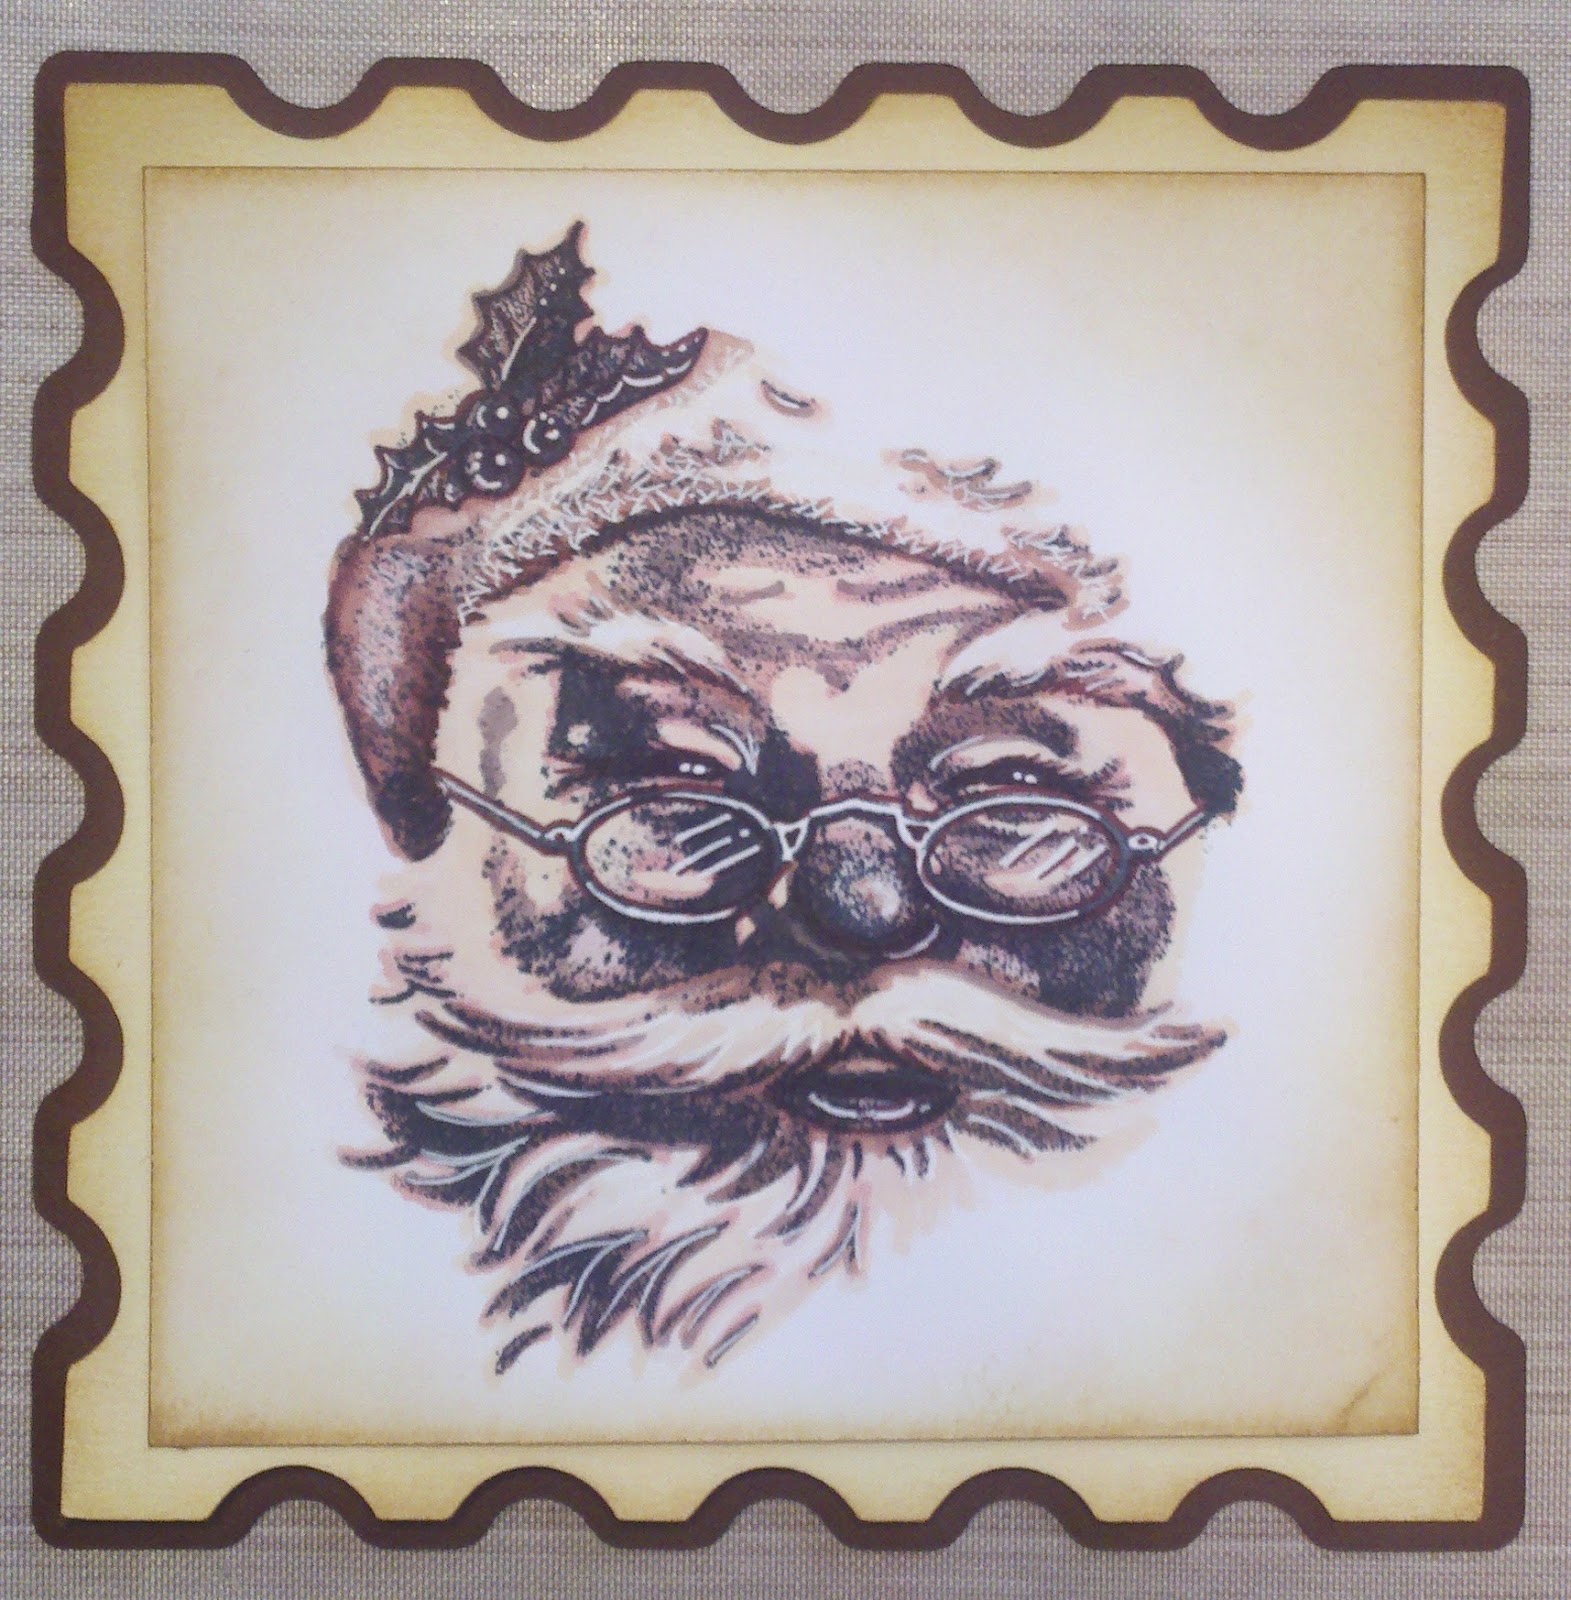
The second mat is cut exactly the same, but I substituted cream and brown cardstock instead, even though I stamped the image on white. Once I softened all of the edges with Brushed Corduroy Distress Ink, it unified the colors and brought them all together. As you can see, I left just enough white to highlight Santa's face.
Today I will create the final cards using these as my focal images. I've been toying with several ideas for card layouts and haven't been able to choose. I don't know about you, but I sometimes need to separate myself from the project for awhile to gain fresh perspective. I will put it all together and share the results with you in tomorrow's post.
Thanks for stopping by today and I hope to see you again soon!
Merilee
Recipe:
Cricut Cartridges: Elegant Edges - Stamp (Pg. 37)
Cardstock: Recollections
Blending Card: X-Press It
Stamps: Flourishes - Santa I Believe #SS085
Ink: Memento - Tuxedo Black; Tim Holtz Distress Ink - Black Soot, Brushed Corduroy
Markers and Pens: Letraset Promarkers - Sets 1 and 2, Skin Tones and Skin Accents; Sharpie Extra Fine Point Markers; Sakura Stardust Galaxy Gelly Roll Pens and Classic Bright White Gelly Roll Pens
Tools: Tim Holtz Blending Tool; Fiskars Paper Trimmer, Easy Stamp Press, ; Cutter Bee Paper Snips; T-Square; Martha Stewart Self Healing Mat; Bazzill Basics Splat Mat
You my friend - have some kinda talent! These images are just beyond amazing. I truly love them both and can't stop scrolling back to the top of your post to see them once again. If I had a hat, I would most definitely tip it for you!
ReplyDeleteThank you so much, Tanya! Now if I can only finish the cards! A million and one things have happened since my post and I've been set back a few days. I can't wait to get them done! :o)
DeleteI'm loving these vintage santas! They look very very professional. I'm blown away!
ReplyDeleteLa-Vie
Thank you, La-Vie! I am by far NOT professional...I just like to color, lol! ;o)
Delete