Wednesday, September 21, 2011

Recycled Christmas Cards IV

Hi!  Another recycled Christmas card!  This will be a quick one, I promise!  :o)


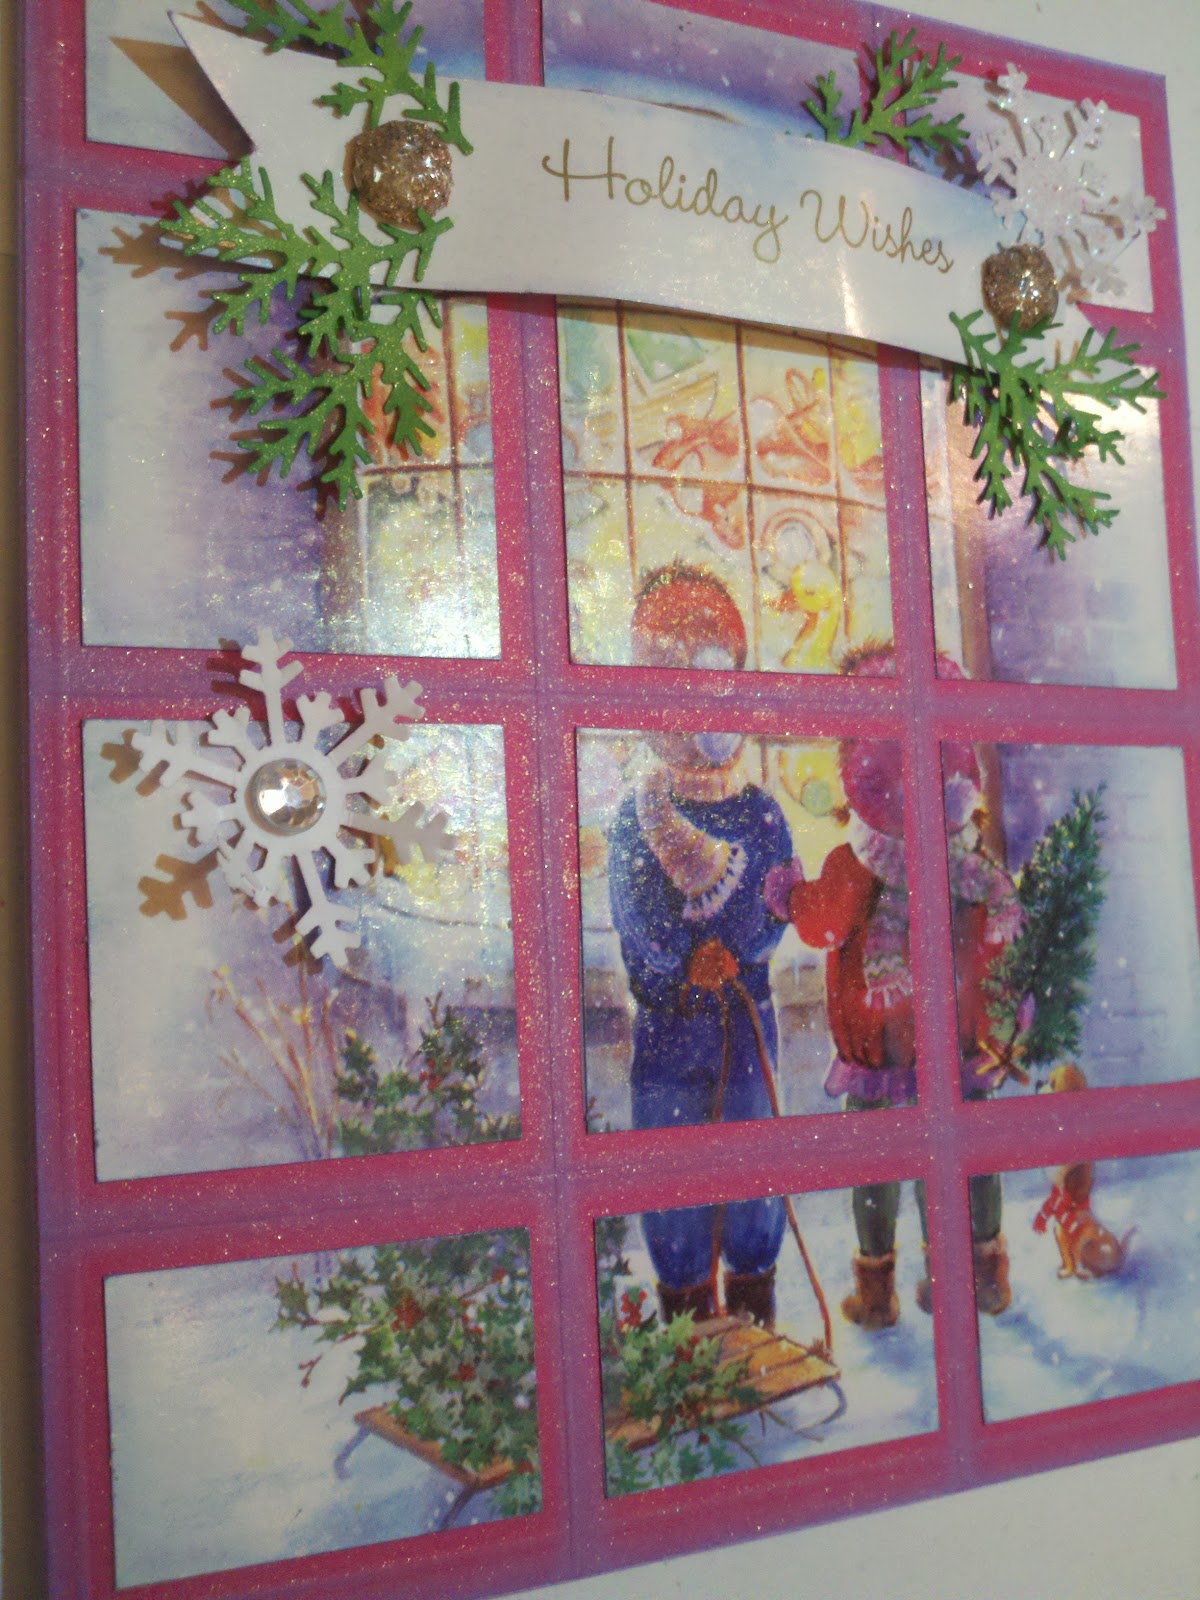
I apologize, but I forgot to take a photo of my card before cutting it up.  I hope you can envision what it may have looked like before it became a series of small squares, lol!  I took my cues from the card itself with the window in the background.  I chose my card base from the colors in the card and, with the children featured alongside their little doggy, I decided to make it a lighthearted one at that!  :o)


Before adhering the "window panes" to my card base, I decided to create my own "window frame" by scoring the card into sections using my scoring tool.  I then inked each scoreline with a pale pink ink and added my card squares.  Using my Martha Stewart punch, I cut the snow flakes--some from matte cardstock and some from glittered cardstock.  I cropped the sentiment from the card, added brads from the office supply store (which I glittered myself using Glossy Accents and glass glitter over top), as well as pine sprigs with--you guessed it, my Martha Stewart punch!  Once I was finished, I spritzed the entire card front with iridescent gold Glimmer Mist.  I really like the way it turned out.


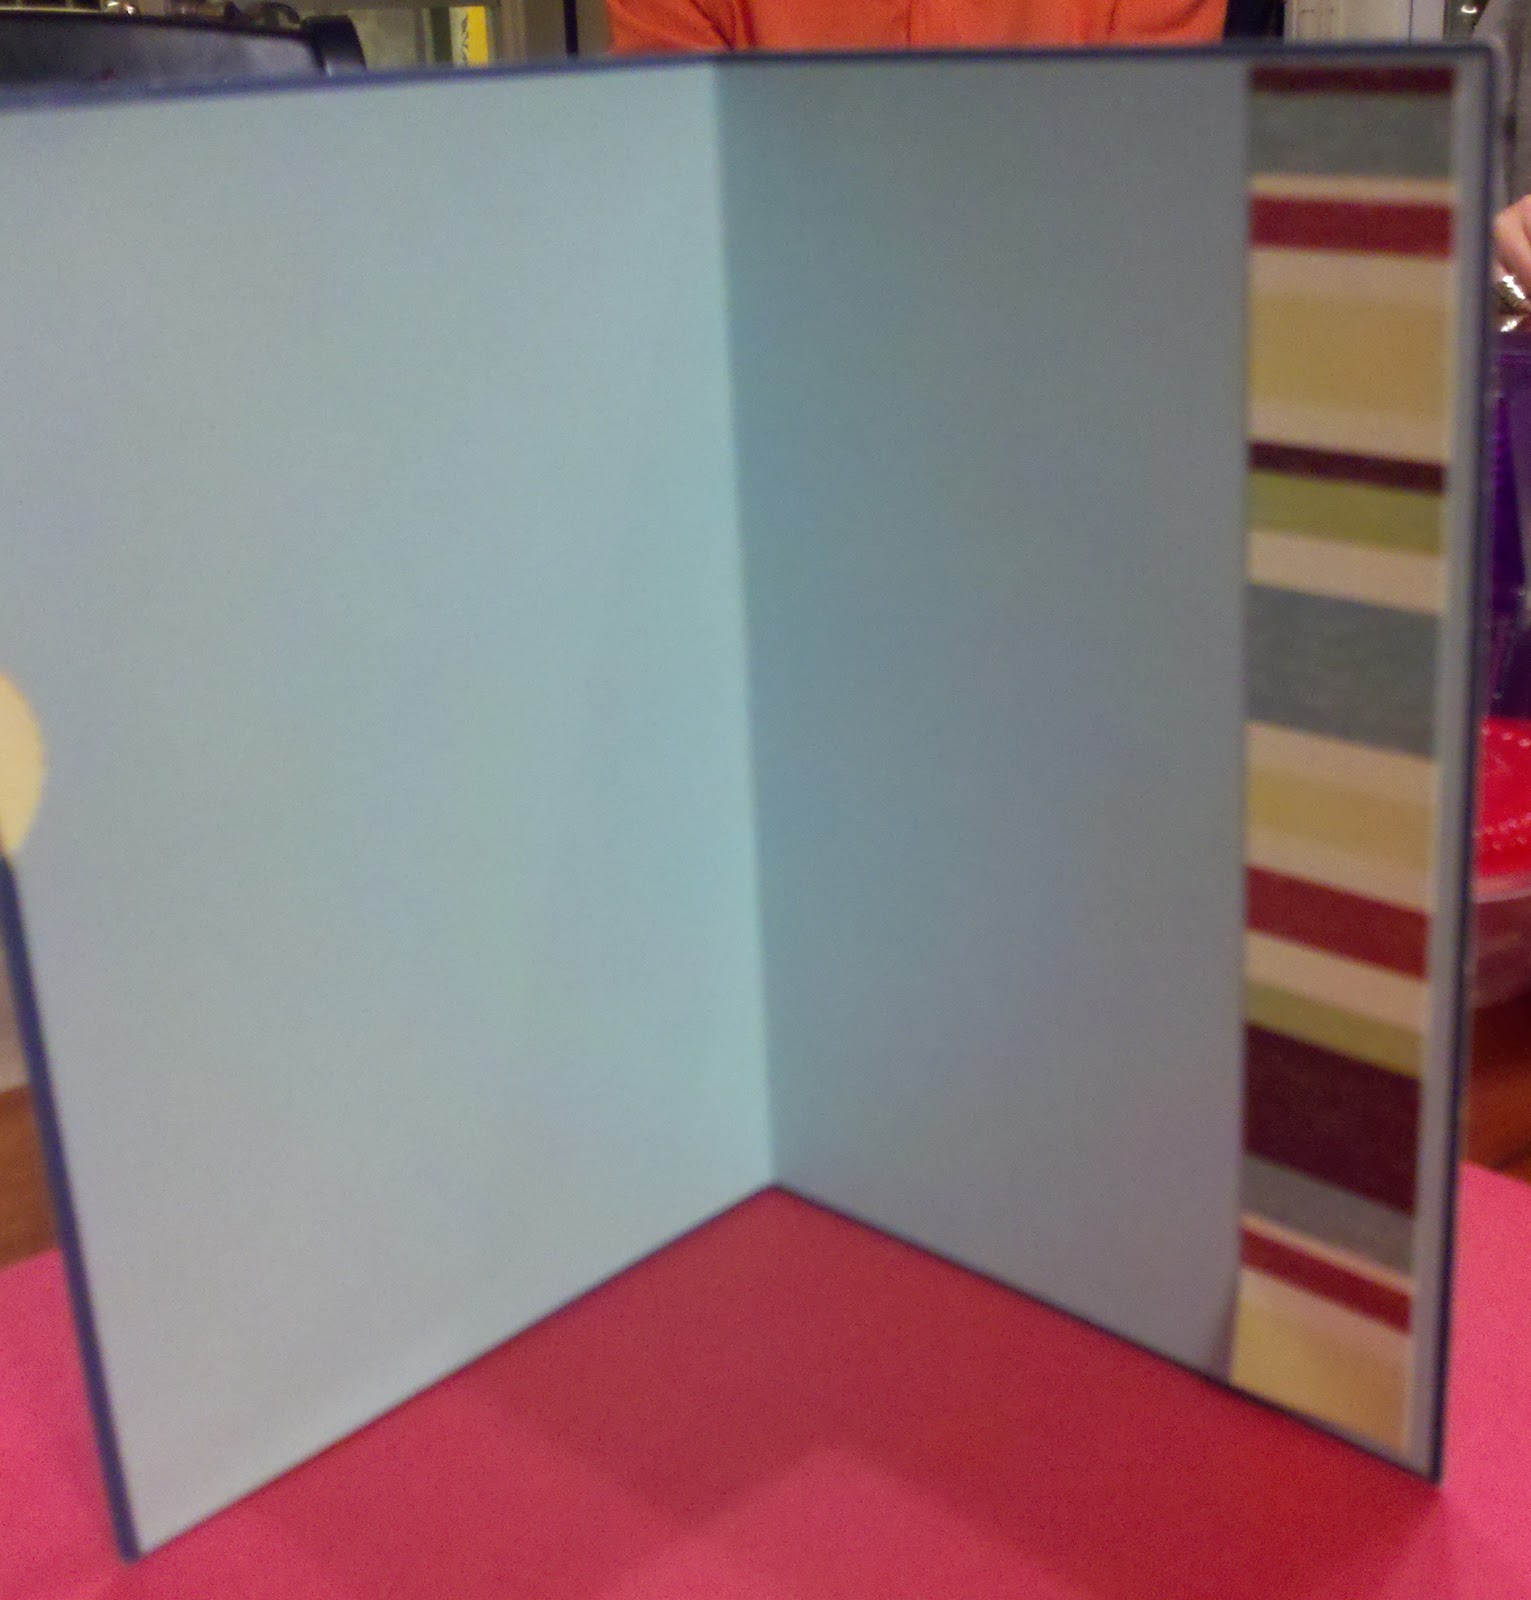
The inside of the card is rather plain, but it offers a nice contrast to the busy front.


The sentiment was cropped with my Spellbinders die and inked around the edges.  I further adorned it with more pine sprigs and little "holly berries" from my stash of epoxy stickers.  I love those things!


I then added a few more snowflakes (two matte with rhinestones), and spritzed the inside with Glimmer Mist.  There are a few little droplets where the mist was not so "misty", but I think it adds to the whimsical,  lighthearted charm of the card, don't you think?  :o}


Well, that's it for today!  Thank you for visiting and enjoy the rest of your day!


Merilee


Recipe:

Cardstock:  Pink and White Cardstock-my stash; White Glitter Cardstock-Best Occasions Glitter Paper Pack
Punches:  Martha Stewart-Pine Sprig and Snowflake 
Embellishments:  Rhinestones-my stash; Epoxy Stickers-Recollections
Ink:  Martha Stewart Create Pigment Ink pads-Pink
Adhesives:  3M Foam Tape; Zots; ATG Gun, Glossy Accents
Other:  Brads-#4 Brass Plated Fasteners-OfficeMax; Emporium Glass Glitter by Wendy Addison-Antique Pink; Glimmer Mist-Iridescent Gold
Tools:  Big Kick; Spellbinders Nestabilities-Classic Rectangles Large; Martha Stewart Scoring Board


Easel Card featuring a Blue Bird

Happy Wednesday, everyone!  Today it's sunny and bright here in Atlanta.  I do think we're expecting rain in the forecast at some point, but for right now the sun is shining and the birds are singing!  :o)


Today's post is close to my heart.  My Mother, Grandmother and older sister loved birds--all animals, really--and they passed that love on to me.  My Mom loved birds, in particular, and she watched them every morning as she sat in the morning sun. Unfortunately, my Mother and Grandmother are no longer with us here on earth and I miss them dearly, but their love of animals lives on in me and my sister.


When I saw these Martha Stewart bird stamps I just couldn't pass them up.  These stamps were my first attempt at coloring with Letraset Pro Markers.  I did get out of the lines a bit, so don't look too close.  I actually stamped and colored this image a long, long time ago, but put it away to use at a different time.  I recently ran across it while reorganizing my art studio and just couldn't resist using it on a card.  I love the colors--they were my Mom's favorite.


So here is my finished card.


I really love these easel cards.  They are easy to make and create a beautiful presentation, don't you think?  Now let's take a look at the details.


For the image itself, I stamped it on regular cardstock using black StazOn Ink.  I then came in with my Letraset Pro Markers and filled in the body.  The inks bled a bit on this cardstock--I didn't realize I needed special paper to effectively blend colors with no bleeding.  Due to the bleeding, I came back in with my Fine Point Sharpie Pen to redefine it.  Once I finished my coloring, I then highlighted with my watercolor pencils for a finishing touch.  As I said before, this was my first attempt ever at this type of art, so I went above and beyond, mixing different types of markers with pencils, but I was happy with the overall image.


After all was said and done, I came back in with my blending tool and a small amount of ink to add a bit of a gray cast around the edges of the image.  I think it lends a rainy day feel to the image, which is just what I was going for.  I love the way the greens of the grass and leaves become so vivid and beautiful when it rains--that is the feel I wanted to convey in this image.


When the image was completed, I scored the edges and inked them in a pale blue.  I then matted the image on gray, pale blue, and then again on dark blue cardstock to really make the blue in the little bird's feathers shine.


My easel card base was cut from gray cardstock.  For the front of the card, I cut my cardstock and ran it through my Big Kick with an embossing folder.  Then I layered two ribbons and adhered them to the left-hand side of the card and strategically placed three small, very pale green pearls along the embossed edge.


As I looked at my image, I thought it needed a little something extra to pop off the card.  It just so happened that I had gotten my brand new Flower Shoppe Cricut Cartridge in that day and couldn't wait to create a flower to add to this card!  The rose was cut from the same pale blue cardstock used for the matting.  I needed to mist it with water in order to effectively work the petals outward without tearing them.  Once I was satisfied, I hot glued it to a round base and added a bit of color with a No., 2 paint brush and acrylic paint.  I just love the way this rose turned out and I can't wait to make more flowers with the cartridge!  :o)  After adhering the rose, I added some silk leaves and a gray satin bow.  I also added a tiny flower to the center.


For the inside of the card, I used dies and coordinating stamps from My Favorite Things.  As you can see, I'm not the best stamper in the world...I'm really just a newbie in the stamping world and learning along the way.  I used light blue ink for the stamp around the edge of my oval, and then dark blue ink for the sentiment.


This particular die set comes with three different dies which I decided would be pretty all layered together for this card.  I then added three pale green pearls.  In each side I punched holes and added silver eyelets through which I ran my ribbon.  I used clear fishing line from my hubby's tackle box to secure the ribbons in place and tied knots on the backside.  Then I added tiny flowers for a finishing touch.


Three layers of the same cardstock were adhered on the inside of the card, with the gray layer embossed.  Of course, I always ink my edges.  I then adhered my sentiment with foam tape to pop it up just enough to catch the card and hold it in place when in a standing position.


Most of the cards I make I have a particular person in mind.  All the while I'm creating, I have that person in my heart.  I plan to send this card to a dear friend of mine.  I hope she doesn't see it on my blog before it arrives in her mail!
White
I hope you enjoyed this card and I'll see you later today with my last recycled Christmas Card.  Until then, have a great day!


Merilee


Recipe:
Cardstock:  All colors-my stash
Cricut Cartridge:  Flower Shoppe, Basic 1, Pg. 12 
Ribbons:  Blue and Gray Ribbons-my stash; Printed Ribbon-Celebrate It
Embellishments:  Small Flowers-Hobby Lobby; Silk Leaves-Hobby Lobby; Adhesive Pearls-Recollections; Silver Eyelets-my stash
Stamps:  Martha Stewart Create-Bird;  My Favorite Things-Well Worn Collection
Inks:  StazOn Ink-Jet Black; Color Box Liquid Pigment Chalk Ink-Navy Blue and Light Blue
Adhesives:  3M Foam Tape; Zots; ATG Gun, Hot Glue
Tools:  Big Kick; Embossing Folder-QuicKutz-Geometric Circles; Hot Glue Gun; My Favorite Things Die-namics Dies-Well Worn Collection

Tuesday, September 20, 2011

Recycled Christmas Cards III

Hello again!  Today I've got two posts again!  :o)  It seems it's feast or famine here in Merilee Lane blogosphere!  :o)  I hope you're enjoying the feast, lol!


My next card is yet another continuation of my Christmas Card recycling blitz!  Here is the card in its humble beginnings:


Unfortunately, once again I forgot to take a picture of the card before cropping the image (oops!), but I think you get the idea.  I think you can see the beautifully embossed snow scene in the background.  I still plan to find a way to use this background, but for today's card, I chose Santa and the snowman.


Once again, I used my Spellbinders dies to crop the image, as well as the two mats.  Each layer was inked with gold metallic ink before layering them together.  I also took just a tiny bit of Glossy Accents to fill in Santa's boots and belt, as well as the snowman's buttons.


The final card looks like this:


The card base was cut of green cardstock.  I then used the same snowflake embossing plate as the previous card, but this time I adhered the debossed side to the card.  Using my gold metallic ink and a blending tool, I applied a light layer of ink in a circular motion to highlight the debossed snowflakes.  I really like the effect.  Once I was finished, I mounted the layer on top and applied a green strip of paper across the center with a red velvet ribbon on top.  With foam tape, I then adhered my matted image and added a double bow, some red sparkly beads, and another sprig of pine with my Martha Stewart punch.  However, this time I applied a small amount of Glossy Accents to the sprigs to give them a bit of presence.


For the inside of this particular card, I took a sentiment I found in a different card, cropped it with my die,  framed it in scraps of red cardstock that I mitered at the corners, and matted the finished frame on green cardstock.  I set that aside and took a piece of white cardstock, scored around all the edges, inked the scored area with the same ink as on the card front and, finally, adhered it to the inside card base.  Once that was in place I mounted my sentiment and added more pine sprigs.


That's it for today!  I hope you enjoyed my projects and begin recycling your favorite cards into beautiful works of art.  If so, please email me so I can see your work!


Thanks for stopping by and I'll chat with you tomorrow!


Merilee


Recipe:
Cardstock:  Red, green and white-my stash
Recycled Christmas Card:  Hope Greeting Collection-Habitat Org.
Ink:  Color Box Liquid Pigment Chalk Ink-Metallic Gold
Adhesives:  Xyron 5" Sticker Maker; 3M Foam Tape; ATG Gun 
Tools:  Big Kick; Spellbinders Impressabilities-Snowflake; Spellbinders Nestabilities Dies-Classic Rectangles-Large; Martha Stewart Punches-Pine Sprig; Blending Tool
Other:  Glossy Accents; Sparkly Red Beads-my stash; Red Velvet Ribbon-Frank's Nursery & Trims

Recycled Christmas Cards II

Hi All!  Happy Tuesday!  Hope this finds you having a wonderful day.


Today's post is all about more recycled Christmas cards.  If you read my post yesterday, you'll see that I've made it my mission to take some of that clutter and turn it into art--mail-able art, that is!  So, on that note, I have another card to show you today.


The card began it's life like this:


I must admit that I accidentally took the photo after I had cropped (and embossed) the portion of the image I chose to use for this card...sorry!  The next photo makes things a little clearer:


The card I decided to try (for the first time) is an easel card with a twist--a "twisted easel" card!  Forgive me, but as hard as I've tried to remember, I simply cannot recall where I saw this recently.  However, if you'd like to view a video tutorial on how to make this card, go to youtube.com and type in "twisted easel".  There are many video tutorials from which to choose.

Okay, on to the finished card!  This is it and it is definitely one of my favorites!  :o)


For the specifics, I'll begin with the red cardstock card base, which I inked around the edges and on the inside base with my blending tool.  On top of that I placed a piece of gold cardstock which I embossed with snowflakes.  In order to add detail, I rubbed white ink very lightly over the raised snowflakes and then adhered it to my red base.  Next I added two layers of ribbon around the center, upon which I added a bit of bling.

The image was cropped from the original card using a Spellbinders die.  To enhance the frame around the image, I decided to use gold embossing powder along the edges.  Next, with a larger size of the same die, I cropped another rectangle, this time from my red cardstock.  Again, I used gold embossing power along the edges of the frame and then attached my image to this rectangle using foam tape.  When applying the layered image to the card over top of the two ribbon layers, I chose to use more foam tape (on the top and bottom of the image only).  This kept the image even all the way around its perimeter.


The next step was, of course, to add the details...the part I love the most!  I used my Martha Stewart punches for this!  :o)  The snowflakes were done in matching red cardstock and further adorned with small bells in the centers.  I then added a lovely sugared flower in the same background gold-tones, set off by sprigs of pine (one of my all-time favorite Martha Stewart punches).

For the inside sentiment I used a Christmas stamp on red cardstock which I cropped with my oval die and mounted on top of another corresponding die cut in gold.  Further, I cropped an oval acetate, ran it through my Xyron Sticker Maker, and layered each one atop the next to complete the focal set.


For the final touch, another set of ribbons, some bling, and a dash of pine sprigs.  

I hope this inspires you to dig out your favorite Christmas cards (or any cards for that matter) and reuse them to create new works of art.  If so, please email me so I can see your creativity, too!

Have a great day!

Merilee

Recipe:
Cardstock:  Red and gold-my stash; Acetate-recycled/reused Cricut Cartridge blister packaging
Recycled Christmas Card:  Hope Greeting Collection-Habitat Org.
Ribbons:  Red Velvet Ribbon-Frank's Nursery & Trims; Metallic Gold/Red Ribbon-Holiday Time
Embellishments:  Sugared Flower-Boutique Fleur Mulberry Paper Flowers by Recollections; Jingle Bells-my stash; Gold Rhinestones-Martha Stewart Create; Blue Rhinestones-Michael's 
Inks/Embossing Powders:  Tim Holtz Distress Ink- Fired Brick; Color Box Liquid Pigment Chalk Ink-White; Ancient Gold Embossing Powder-Enchanted Gold by Ranger
Adhesives:  Xyron 5" Sticker Maker; 3M Foam Tape; Zots; ATG Gun 
Tools:  Big Kick; Spellbinders Impressabilities-Snowflake; Spellbinders Nestabilities Dies-Classic Rectangles-Large; Martha Stewart Punches-Pine Sprig and Snowflake; Heat Gun; My Favorite Things Die-namics Die-Well Worn Collection 

Monday, September 19, 2011

Recycling Your Favorite Christmas Cards

Hi Everyone!  This is my second post for today.  I've been working on clearing out some clutter and found a bin of cards.  As I looked through each one, reminiscing about days gone by, I decided to put them to good use.  (My mother always wanted me to find a way to recycle her cards, God rest her soul, so this is for you, Mom!!)  I pulled out my favorite cards and began thinking about card layouts for different images.  Low and behold, the cutest creations came of these old cards!  Here is the process:


This card began its life as above.  I used my photo program to erase the writing on the inside of the card on this one, but in some cases, I either left the writing as it was and cropped the sentiment inside, or I used a little whiteout.


This is the redesigned card.  As you can see, I cropped the sentiment on the front of the card, inked the edges and layered it on red cardstock.  I then added a bow.  I fussy-cut the tree and stack of gifts, and further defined the image by adding highlights and shadowing with my colored pencils and white opaque pen.  I then added lots of bling, popped the image up on pop-dots and added it to my card base.


These are close-ups of the card showing the added details.  You'll find little snowballs, gems in the centers of the poinsettias and along the lines of the gifts, as well as green rick-rack to define the bow on the uppermost gift.

The card base itself was done in dark red cardstock.  The top, right-hand edge of the card front is trimmed shorter than the inside edge.  I then cut a piece of dark blue cardstock to fit the card front, dry embossed it with my embossing folder, and then punched one edge with my scalloped edge punch.  Red ribbon lines each edge.  Before the cut image was added, the sentiment was inked, layered atop red cardstock, and attached to the lower half of the card base with foam tape.  This ensures that the sentiment sits lower, underneath the tree and gifts.


For the inside of my card, I added a strip of gold hologram paper down the right-hand edge, making sure it showed through the scalloped edge of the card front above.  After the sentiment was cropped, it was inked and mounted atop blue cardstock.  The smaller image above was done similarly.  I curled the edges of the sentiment slightly and attached it with pop-dots under the center of the sentiment and glue dots under each edge.  Finally, I added a bit of bling to each edge and a bow to the image.  


Hope you liked my recycled Christmas card.  Perhaps this will inspire you to recycle some of your beautiful cards, as well!  I have a few more to show you, too.  I'll add those into a post tomorrow.

Thanks for joining me today and I hope to see you again soon!

Merilee

Recipe:

Recycled Card:  Image Arts Greeting Cards
Cardstock:  Blue and Red cardstock from my stash; Best Occasions-Prismatic Paper Pack
Ink:  Tim Holtz Distress Ink-Fired Brick; Color Box Cat's Eye Fluid Chalk
Ribbon:  3/16" Red Ribbon-Offray; Martha Stewart Create-Piped Ribbon Bow Stickers; American Crafts-Premium Ribbon Rick-Rack
Embellishments:  Michael's-Stud Embellishments and Rhinestone Stickers; Crystal Stickers-Glitter Domes; Recollections-Epoxy Stickers; Say It In Pearls-Embellishments by Prima
Adhesives:  Recollections-Pop-Dots; Foam Tape-3M; Zots; Inkssentials-Glossy Accents by Ranger
Tools:  Big Kick; Qu-cKutz Embossing Folder-Swirls; Fiskars-Scalloped Punch and Trimmer; Kimberly Watercolor Pencils by General's; Inkssentials-White Opaque Pen; Picassa 3 Photo Program; We R Memory Keepers-Crop-A-Dile Corner Chomper


September Card Making Class

Hi everybody!  I'm finally back again and I've got so much to share with you!

My summer was wonderful.  I was able to spend so much time with my grandchildren, my daughter and son-in-law, and my husband.  We even found a little extra time to take a short vacation with my brother and sister-in-law to visit Seattle, Vancouver, B.C. and Victoria, B.C.!  It was wonderful and we really enjoyed ourselves.

Now that I'm back to blogging, I have so many projects to post that were made during my absence.  I will probably make more than one post each day to try to catch up.  Thanks for being patient with me!

Now on to my post for the day.  I recently held my September card making class and wanted to post the cards that were made during class.  I couldn't have been happier with the results, and my students, Stephani and Susan, really showed their talent in these adorable cards!

First of all, the idea for these cards was inspired by Glora's Crafts at glorascrafts.blogspot.com.  Although my design is slightly different than Glora's, you can see a tutorial on how to make these cards by following this link:  http://glorascrafts.blogspot.com/search/label/CC%3A%20Wild%20Card.  Just as Glora did, we used the pinwheel card base on the Wild Card Cricut Cartridge.  We also used the Paper Doll Dress Up Cartridge for the characters and Peachy Keen Stamps for the faces.  They really are the cutest faces ever!

The cards were surprisingly easy to make and oh so cute!  Below are photos of the finished cards.  I've included several photos to show you, since each card has four different faces as you turn the dial.  Enjoy!

First is Susan's card featuring Superman!  Isn't he adorable?!?


Susan created this Superman card using patterned papers from the Family Page Kit by Colorbok, and solid papers from the Textured Cardstock-Brights collection by The Paper Studio.  The sparkly "S" Susan chose from the Mini Shimmer Alpha sticker collection by Making Memories.  Susan lined the inside of her card with the same light blue used for Superman's costume and added a strip of patterned paper to finish it off.

Next up, Frankenstein!


We thought Frankenstein turned out adorable!  Stephani chose patterned papers from the Fostering Creativity Biggie Bundle by Karen Foster.  She also flocked his little orange patch, as well as featured a Clear Charm from Tim Holtz Ideology Fragments, with a jack-o-lantern cropped from the patterned paper. Stephani glued it to the backside with the Zyron Create-A-Sticker.


As you can see, both ladies popped up their little characters using foam tape in order to offset the character from the brad underneath, which holds the spinning wheel to the underside of the card.  The foam tape lifted the character from the card base just enough to keep it from having a lump where the brad was placed.  It also gave the card just the right amount of dimension.

Well, that's it for today!  Thank you for visiting my blog!

Merilee

Recipe:

Papers:  Family Page Kit by Colorbok; Textured Cardstock-Brights collection by The Paper Studio; Fostering Creativity Biggie Bundle by Karen Foster
Cricut Cartridges:  Wild Card, Pinwheel-Pg. 51; Paper Doll Dress Up, Body-Pg. 29, Superboy-Pg. 56, Frankenson-Pg. 52; Plantin SchoolBook, Circle-Pg. 72

Stamps:  Fun Kiddie Face Assortment and Critter Faces Set A-Medium, both by Peachy Keen Stamps
Ink:  Craft Smart Dye Based-Black; StazOn-Jet Black; Martha Stewart Create Pigment Ink-Aquarium; Tim Holtz Distress Ink-Old Paper, Fired Brick, Stormy Sky
Glue:  Xyron Create a Sticker "X" and 5"; Foam Tape by 3M; Be Creative Tape-3mm; Zig 2-Way Glue
Other:  Kimberly Watercolor Pencils by General's;  Tim Holtz Ideology Fragments-Clear Charms; Michael's Dollar Bin-Flocking; Mini Shimmer Alpha sticker collection by Making Memories