Hi Everyone! I hope you are all enjoying the holiday season. I'm not quite ready for my family to arrive, but I'll finish things up this weekend, I hope!
Today I have a clean and simple Snowflake card to share. This card was a little difficult for me. I am a "more is more" kind of gal and it was hard not to add more detail. However, I refrained as best I could and this is the result:
 I entered this card in the Cardz TV Design Team Challenge #21, "I'm Dreaming of a White Christmas". I wish you could see the details a bit better. Instead of adding a lot in the way of embellishments, I added different textures. The background is dry embossed in a snowflake pattern. I used my fine tip glue pen to add a bit of glitter to only a few flakes. Then I used a tiny brush and some pearl paint to add a bit of iridescent shine to a few others. Hopefully you can see that detail a bit better below...
 The embossed background was matted on white cardstock and wrapped in silver satin ribbon. Then I cut a very thin piece of embossed silver metallic cardstock to apply to the center of the ribbon.
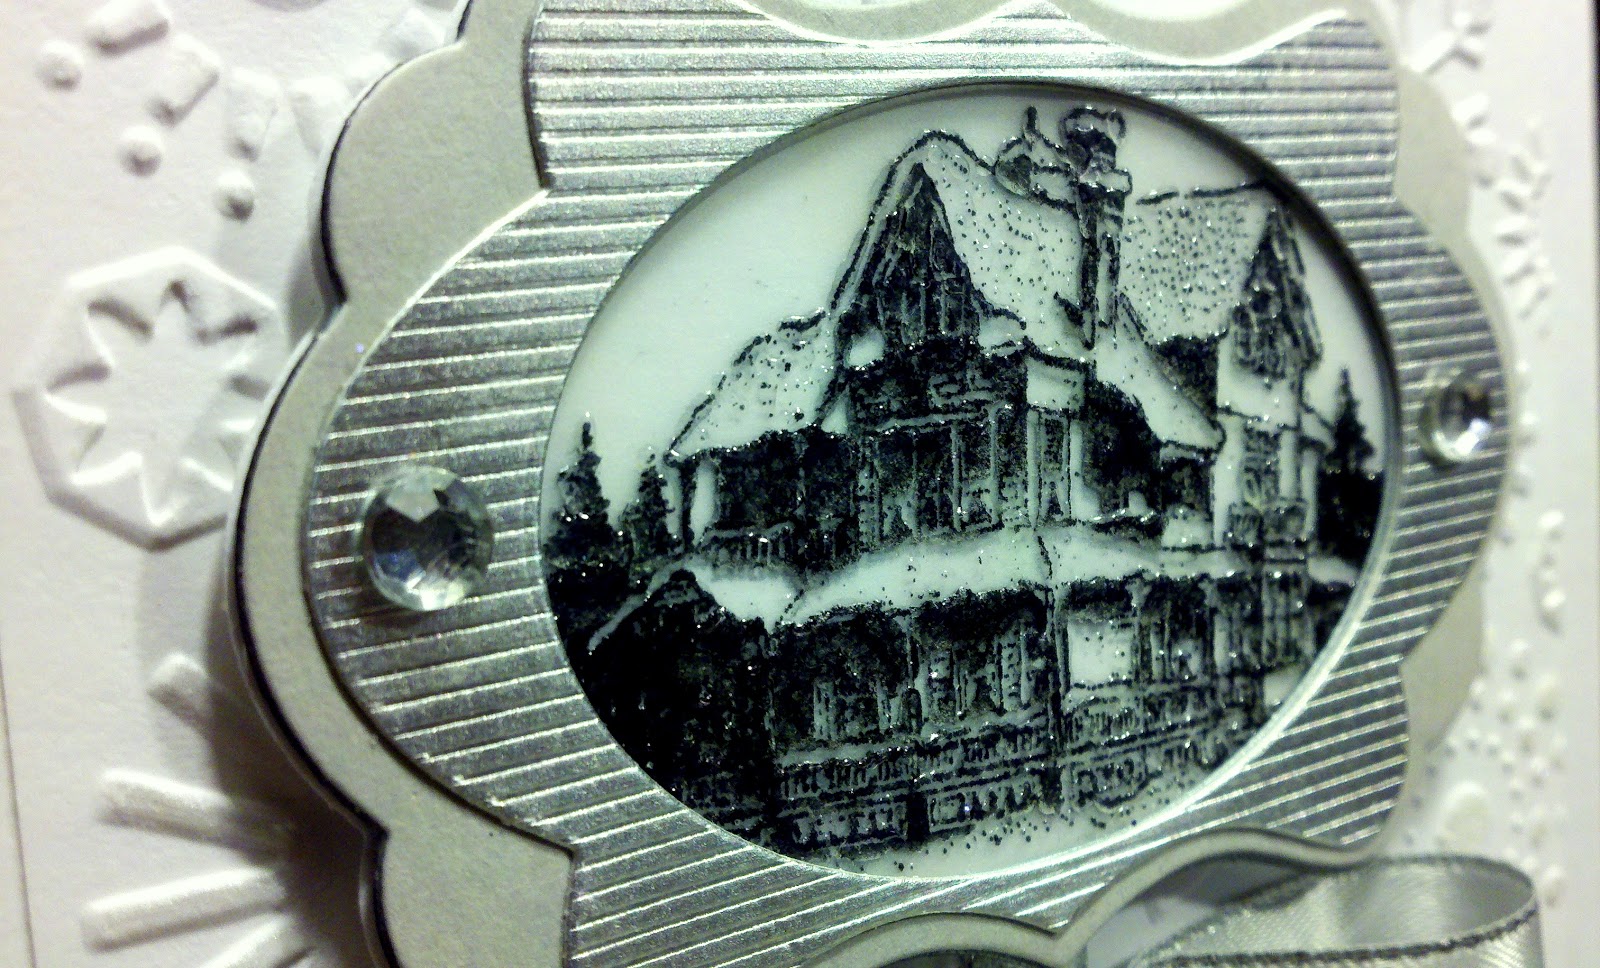
The focal image was stamped twice, once on white copy paper and once again on vellum. The vellum image was then immediately sprinkled with ultra thick embossing powder and heat set. I wasn't sure how this would turn out, but was pleasantly surprised by the perfect dimension it provided.
 I used my MFT Wellworn die to create the frame for the focal point. I cut the background in flat gray cardstock and then the center frame was cut from embossed silver metallic cardstock. I then added rhinestones on either side to finish off the look without taking too much away from the focal image. I layered the two stamped images on top of each other to add a bit of depth in color, and then set the frame atop. The entire focal image is adhered with pop dots for dimension and a simple bow tied and adhered beneath.
 Here is another view so you can see the dimension. I'm sorry...the sparkly and iridescent snowflakes in the background don't seem to photograph very well.
 I also kept the inside of the card simple and clean. You may be able to see the detail in the snowflakes a little better below...
 I added the same ribbon around the cardstock and topped it with a thin strip of metallic cardstock to match the card front.
 And, of course, the back wouldn't be complete without my company logo. The frame around it was cut with my Cricut Expression and Lacy Labels cartridge in the same embossed, metallic cardstock. I usually always add a rhinestone above the banner to add a bit of personality. (There goes my "more is more" again, lol!)
I hope you enjoyed my card! I will be back soon with another project!
Thanks for joining me and happy holidays to you and your family!
Merilee
Recipe:
Cardstock: Recollections; AC Specialty Paper-Foil
Stamps: Stampin Up-Christmas Lodge; Flourishes-Sentimental Christmas-SS179; PSA Essentials Personalized Stamp
Die: MFT Die-Namics-Wellworn
Ribbon: Really Reasonable Ribbon
Ink: Memento-Tuxedo Black
Today I have a clean and simple Snowflake card to share. This card was a little difficult for me. I am a "more is more" kind of gal and it was hard not to add more detail. However, I refrained as best I could and this is the result:


The focal image was stamped twice, once on white copy paper and once again on vellum. The vellum image was then immediately sprinkled with ultra thick embossing powder and heat set. I wasn't sure how this would turn out, but was pleasantly surprised by the perfect dimension it provided.


I hope you enjoyed my card! I will be back soon with another project!
Thanks for joining me and happy holidays to you and your family!
Merilee
Recipe:
Cardstock: Recollections; AC Specialty Paper-Foil
Stamps: Stampin Up-Christmas Lodge; Flourishes-Sentimental Christmas-SS179; PSA Essentials Personalized Stamp
Die: MFT Die-Namics-Wellworn
Ribbon: Really Reasonable Ribbon
Ink: Memento-Tuxedo Black
Adhesives:
Zig Two-Way Glue, Pop Dots; Glue Dots; Zots;
Scotch- ATG, Mounting Tape
Other: Ultra Thick Embossing Powder
Tools:
Fiskars-Paper Trimmer, Easy Stamp Press; Scotch ATG Gun; Cutter Bee Paper Snips;
Martha Stewart Score Board; T-Square;
Sizzix Big Kick Machine; Cricut Expression; Cricut Lacy Labels Cartridge
So cute. Love the CAS look. The embossing and the scene. Thanks for playing along this week with us at CTVS
ReplyDeleteWow...this is stunning. So beautiful. Thank you so much for creating with us at CardzTV!
ReplyDeleteYour card is simply stunning! The details are just fabulous, I love it!
ReplyDelete