Hi Everyone! Today's vintage 50th birthday card was so much fun to make!
This card is both a card and an envelope all in one. I chose this card style because it was reminiscent of the old photo albums in which my parents used to receive their photos after developing. I couldn't resist its retro feel, which was in my mind when I began this process.
The card was cut using my Cricut Expression and my trusty Wild Card cartridge (Scallop-page 32). It isn't really meant to be a card and envelope all in one since it is featured in the manual with a matching envelope, but I loved it just the way it was! I printed it in yellow cardstock, inked the edges with Tim Holtz/Ranger Ink in Fired Brick, and then covered select areas with these darling papers from Cosmo Cricket's Double Deck - Material Girl and Garden Variety. I just love, love, love these papers!
To close the card, I used my Crop a Dile to punch two holes and set my eyelets. I then ran the red satin ribbon through the eyelets and slipped on the tiny tag that I cut using my tag die plate and Crop a Dile III Main Squeeze. I inked the edges and then I made my own dimensional numbers with my Cricut and my bottle of Glossy Accents (I just love that stuff!). Once I finished, I decided to attach pretty daisies to the ribbon ends to keep the ribbon from slipping out and from fraying. I punched four of the daisies with my daisy punch, ran them through my Xyron machine, and attached them back-to-back with the ribbon sandwiched in between. I added flower centers on both sides from my stash of colored dimensional epoxy stickers. Didn't they turn out so cute?!?
(I also used the dimensional epoxy stickers in the centers of the flowers on the designer paper.)
For the feature on the middle panel inside, I cut a darling image from the Crafty Secrets Heartwarming Vintage Collection of Creative Scraps. It was a great freebie when I ordered stamps from the same collection! :o) It so reminded me of my Mom, Aunts and Grandmother.
I chose a coordinating paper from my Double Deck and lined the inside panels. Then I chose a bright yellow cardstock for the feature panel and typeset a sentiment in my word processing program. I printed the sentiment in green and then added pretty gem brads to adorn the upper corners with a little added bling. After inking the edges, the image was matted on another coordinating cardstock from the Double Deck. However, before mounting the image (and so my stems didn't stick out the back of the card) I added little green flower brads in each corner and then mounted the image under my sentiment inside the card.

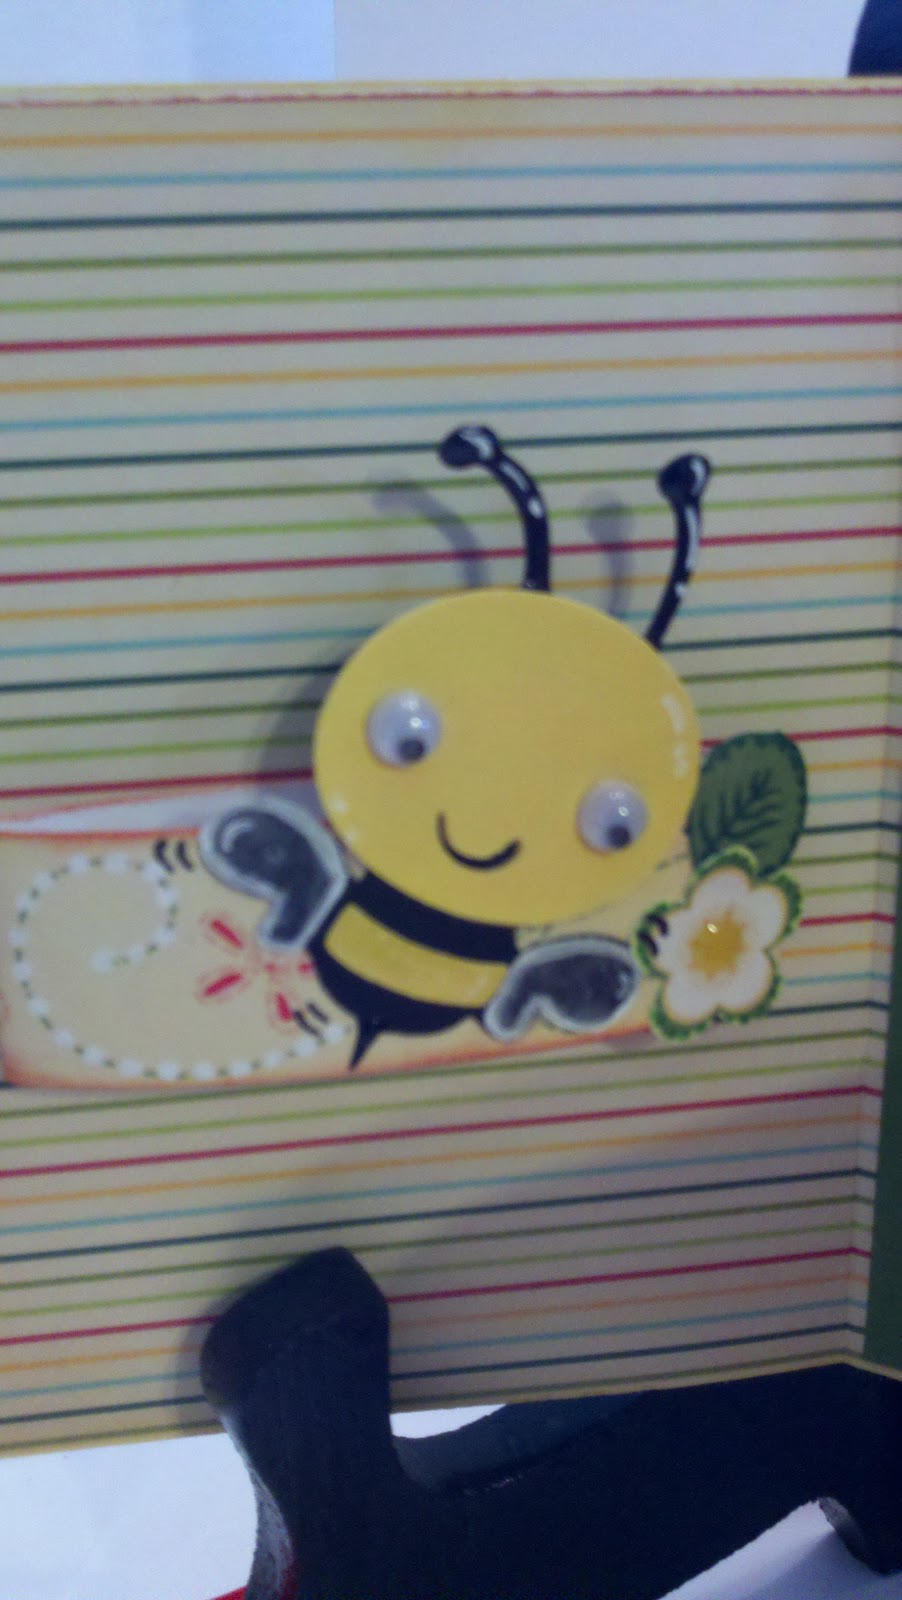
I decided to add a gift card to the inside left panel, so estimated the size I'd need and I cut a strip of cardstock wide enough to accommodate my folder. I then folded it in thirds and, with the open ends in the back, I adhered it to the card. To adorn the band, I took my cues from the darling cardstock I've been using and cut a bumble bee image with my Cricut using the really cute Create a Critter cartridge. I used my white gel pen to detail the little bumble bee, filled in his wings with Glossy Accents, added tiny wiggle eyes from my stash, and attached him to the band. I then cut a flower and leaf from the designer paper and added it to the band, as well.


I cut a small folder with my Cricut from my Tags, Bags, Boxes and More cartridge and rounded the corners using my Crop a Dile Corner Chomper. Then I inked the edges. Once again I cut some strawberries, flowers and leaves from the designer paper to adorn the outside and used my markers and Glossy Accents to add dimension. (It would have been cute to use my Cricut to cut the fruit and flowers, too.) The flower centers are accented with dimensional epoxy stickers.
For the inside flap I used the same yellow cardstock as above, inking the edges and stamping "Happy Birthday" using Fired Brick Ranger ink. The sentiment is from a darling stamp set from Crafty Secrets' Clear Art Stamps, the Heartwarming Vintage Collection. I also added another strawberry cut from the designer paper and a couple more leaves.
Once inside the folder you can see the cute papers which inspired the strawberry and bumble bee motifs! Isn't this the cutest paper ever?!?
I like lots of interaction, so I made yet another band inside to hold a small envelope. The band was made in the same way as before and decorated with more cut images from the designer paper. The envelope was cut from printed vellum using my Cricut and the Tags, Bags, Boxes and More cartridge. I rounded the edges to match the folder and inked them with the same color Ranger ink.
This project was so much fun and I really enjoyed giving to my sister-in-law! :o)
Thanks for stopping by and have a great day! :o)
Merilee
Recipe Ingredients: Papers: Cosmo Cricket Double Deck-Material Girl and Garden Variety; The Paper Studio-Textured Cardstock; Printed Vellum
Designer Image: Crafty Secrets Creative Scraps-Heartwarming Vintage
Embellishments: Dimensional Epoxy Stickers-Recollections; Red Satin Ribbon-Offray
Stamps: Happy Birthday Sentiment-Clear Art Stamps, Crafty Secrets-Heartwarming Vintage Collection
Ink: Ranger/Tim Holtz Distress Ink-Fired Brick
Tools: Cricut Expression; Cricut Cartridges-Wild Card (Scallop, Pg. 32), Create a Critter (Bee, Pg. 68), Tags, Bags, Boxes and More; Crop-A-Dile Corner Chomper; Crop-A-Dile II; Crop-A-Dile III Main Squeeze (Die Plate Tag); The Paper Studio Flower Punch; Xyron Sticker Maker


